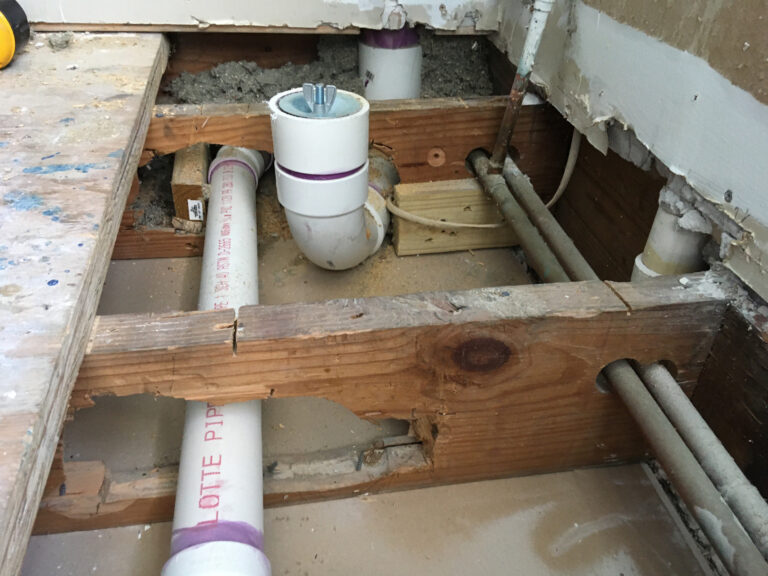
Body Spray Plumbing Diagram
A body spray plumbing diagram is an illustration of the pipes and fixtures needed to install a body spray shower system. It includes instructions on how to correctly place the pipes, fittings, and other components to create a functional and efficient system. It is an essential resource for any homeowner or plumber looking to install a body spray shower system. It can help to ensure that the system is installed correctly and safely and that it will function properly for years to come.
Definition and Overview of Body Spray Plumbing Diagram
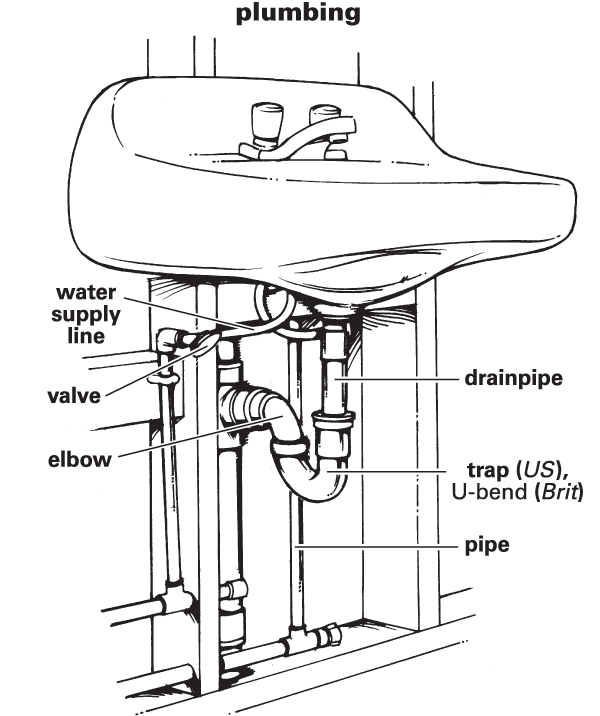
Understanding the basics of body spray plumbing diagrams is essential to correctly install and maintain plumbing systems. A body spray plumbing diagram is a schematic layout of a plumbing system that shows the location and arrangement of various components, such as pipes, fixtures, valves, and other elements. These diagrams are used to explain how the body spray system works, what components are necessary, and where they should be located to ensure efficient flow and proper operation.
Body spray plumbing diagrams are typically created by plumbing professionals but can also be used by technicians, homeowners, and others who need to understand the plumbing system to install or repair it. The diagrams provide a comprehensive overview of the system, including all of the components and their locations, as well as the flow of water and how it is distributed throughout the system. Additionally, the diagrams can be used to troubleshoot any problems that may arise with the system.
By taking the time to understand the basics of body spray plumbing diagrams, homeowners and technicians can ensure that their plumbing systems are installed and maintained correctly. With the help of these diagrams, any issues with the plumbing system can be quickly and easily identified and resolved.
Benefits of Using a Body Spray Plumbing Diagram
When it comes to plumbing, the installation of a body spray can be intimidating for homeowners. A body spray plumbing diagram is an invaluable tool that can make the job easier and more manageable. A body spray plumbing diagram outlines the exact placement of the pipes, valves, and components necessary for a successful installation. By using a diagram, homeowners can accurately measure, cut, and fit pipes and other components, without the guesswork associated with more traditional plumbing installation methods.
A body spray plumbing diagram also ensures that the installation is up to code. Plumbing codes are complex and it can be difficult to interpret them correctly. With a plumbing diagram, homeowners can rest assured that their installation is compliant with local codes and regulations. This prevents expensive repairs and fines and ensures that the installation is safe and secure.
Using a body spray plumbing diagram also helps to minimize the time and effort associated with a plumbing installation. By following the diagram step-by-step, homeowners can quickly and easily complete the job. Furthermore, diagrams provide detailed instructions in a simple and easy-to-understand format, making them ideal for novice DIYers.
In conclusion, a body spray plumbing diagram is an essential tool that can help homeowners install their plumbing correctly and efficiently. Diagrams provide detailed instructions in an intuitive format, ensuring that the installation is up to code and compliant with local regulations. Furthermore, diagrams minimize the time and effort associated with a plumbing installation, making them an invaluable asset for novice DIYers.
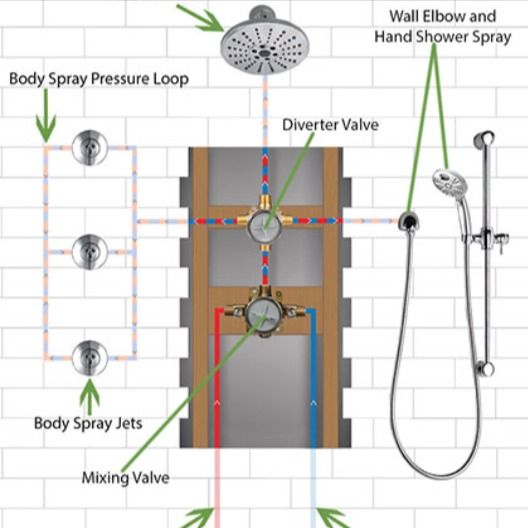
Components of a Body Spray Plumbing Diagram
A body spray plumbing diagram is an essential tool for any plumber when dealing with a body spray setup. It is an essential part of the process of installing and maintaining body sprays. A body spray plumbing diagram provides a visual representation of the components of the plumbing system. It is also helpful in troubleshooting any issues that may arise during the installation or maintenance of the body spray. Understanding the components of a body spray plumbing diagram can help a plumber ensure the body spray is installed correctly and is functioning properly.
A body spray plumbing diagram consists of various components, including the main water supply line, the body spray connection, the wall body spray, the shower head, the thermostatic valve, the hot water supply, the cold water supply, the diverter valve, and the drain. The water supply line carries water from the main water source to the body spray connection. The body spray connection connects the water supply line to the wall body spray. The thermostatic valve is responsible for controlling the temperature of the water as it is delivered to the body spray. The hot and cold water supply lines are connected to the thermostatic valve and the diverter valve. The diverter valve controls the flow of water from the hot and cold water supply lines to the body spray. Finally, the drain ensures that all water is properly drained away from the body spray.
A body spray plumbing diagram helps a plumber understand the components of the body spray setup and how they all fit together. It is essential to ensure that the body spray is installed correctly and is functioning properly. A body spray plumbing diagram can help the plumber identify any issues or potential problems and address them before they become bigger issues.

Installation Process for a Body Spray Plumbing Diagram
Installing a body spray plumbing diagram for your shower can be a daunting task, but with the right tools and knowledge, it’s a relatively simple process. To get started, you need to first understand the basic components of a body spray plumbing diagram. It consists of a showerhead, a shower arm, an elbow connection, and a body spray. Once you have all the parts, you can begin the installation process.
To install the body spray plumbing diagram, start by attaching the shower arm to the wall. Make sure the arm is firmly secured, then attach the elbow connection to the shower arm. Then, attach the showerhead to the elbow connection. Finally, attach the body spray to the showerhead. Once all the pieces have been connected, you can test the system to make sure everything is working properly.
Installing a body spray plumbing diagram is a great way to give your shower a luxurious look and feel. With the right tools and knowledge, it’s a relatively simple process that can be completed in no time. With a well-installed body spray plumbing diagram, you’ll be able to enjoy your shower with a whole new level of luxury and relaxation.
Troubleshooting Common Issues with a Body Spray Plumbing Diagram
Are you having trouble diagnosing a plumbing issue with a body spray? If so, you’re not alone. Many homeowners struggle to make sense of the complicated Body Spray Plumbing Diagrams that often accompany installation instructions. To help you out, we’ve compiled an easy-to-follow guide to help you identify and troubleshoot common plumbing issues.
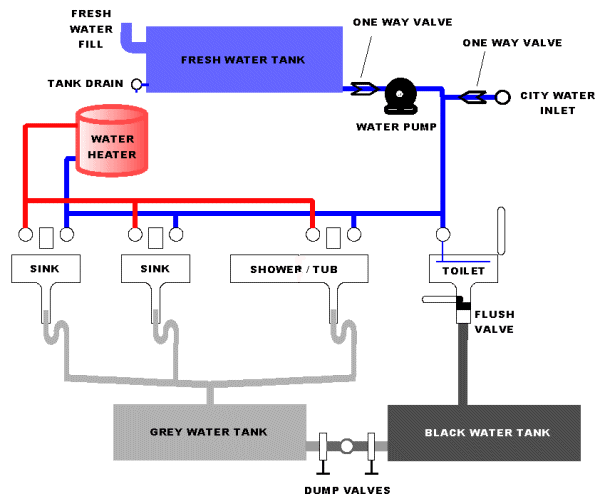
Firstly, it’s important to understand the anatomy of a body spray plumbing diagram. This consists of four main components: the inlet, outlet, valves, and piping. The inlet is the source of the water, the outlet is where the water exits, the valves control the flow of the water, and the piping connects the three. By understanding these components, you’ll be able to identify and resolve common problems like water pressure fluctuations, leaks, and blockages.
Secondly, take a close look at your body spray plumbing diagram. Make sure all the components are connected correctly and there are no missing pieces. If you find any issues, it’s best to speak to a qualified plumber. They’ll be able to diagnose the problem and advise you on the best course of action.
Finally, always be sure to double-check your body spray plumbing diagram before attempting to make any changes. This will help ensure that you’re not causing any further issues and that you’re taking the necessary safety precautions.
By following these steps, you’ll be able to diagnose and troubleshoot common plumbing issues with a body spray plumbing diagram. If you find yourself in over your head, don’t hesitate to call a professional. They’ll be able to help you identify the problem and provide you with the best advice and guidance.
FAQs About the Body Spray Plumbing Diagram
1. What is a body spray plumbing diagram?
A body spray plumbing diagram is a visual representation of the pipes and fixtures needed to install a body spray shower system. It typically includes the location of the water source, the type of pipes and fittings used, and any additional components that need to be installed.
2. How do I read a body spray plumbing diagram?
Reading a body spray plumbing diagram requires some knowledge of plumbing. It is important to be familiar with the various components of a plumbing system such as pipes, fittings, valves, and fixtures. Additionally, the diagram should be read in a clockwise direction, starting from the water source and working towards the drain.
3. What are some safety considerations when installing a body spray shower system?
Safety is always important when working with a plumbing system. It is important to ensure that the pipes and fittings are compatible with the water system and that the water pressure is appropriate. Additionally, it is important to follow all safety instructions when working with electricity, water, and gas.
Conclusion
The body spray plumbing is an invaluable tool for anyone looking to install a body spray in their home. It provides a detailed overview of the process, from the initial measurements and installation of the body spray to the necessary safety precautions that must be taken. With the help of this diagram, even novice DIYers can confidently install a body spray in their home.