How Do You Test A Toilet Seal?
Testing a toilet seal is an important task to ensure the toilet is in proper working condition. A toilet seal is a rubber gasket that seals the space between the toilet and the floor, ensuring that water does not leak from the bottom of the toilet. To test the seal, start by inspecting the seal for any signs of damage, such as cracks or tears. If the seal appears to be in good condition, pour a small amount of water around the base of the toilet and check for any leaks. If there are any leaks, the seal may need to be replaced. Additionally, use a flashlight to check for any light coming from the base of the toilet, indicating a loose seal. If the seal appears to be in good condition and no water is leaking, the seal can be considered successfully tested.
What is a Toilet Seal and Why Test It?
A toilet seal is a critical component of your toilet system that helps to prevent any water leakage. It is a rubber gasket that is placed between the toilet bowl and the floor creating a watertight seal. It is important to regularly test the toilet seal to make sure it is in good condition and working properly. Testing a toilet seal is relatively simple and can be done quickly.
The first step in testing a toilet seal is to check for any visible signs of damage or wear and tear. If any is noticed, it should be replaced as soon as possible. If the seal looks to be in good condition, the next step is to flood the toilet bowl with water and wait for it to fill up. If any water leaks out from beneath the bowl, then the seal is not properly sealed and should be replaced.
It is also important to check the seal for any obstructions such as limescale, dirt, and debris, as these can prevent it from sealing properly. If any obstructions are found, they should be removed and the seal should be tested again.
Testing a toilet seal is an important part of regular toilet maintenance. By regularly testing the seal, you can ensure that no water is leaking from your toilet and that it is functioning properly. If any issues are noticed, the seal should be replaced as soon as possible to avoid any further damage or water leakage.

Tools Needed for Testing a Toilet Seal
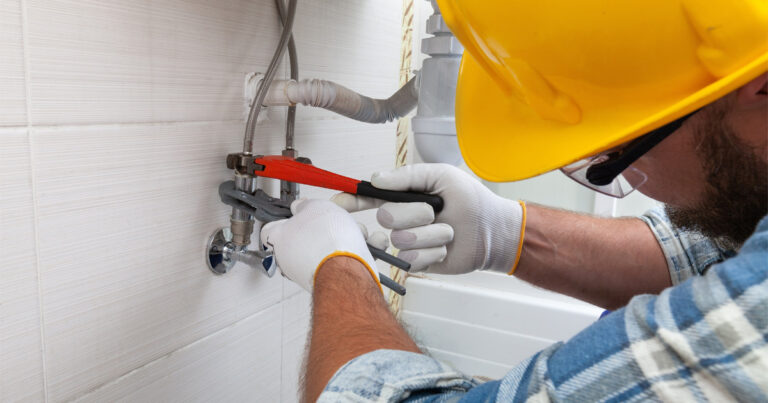
Testing a toilet seal is a job that should not be taken lightly. It requires the right tools to ensure the seal is in good condition and can last for years to come. Having the right tools for the job makes the process much easier and more efficient. The basic tools needed for testing a toilet seal include a toilet auger, a putty knife, a screwdriver, and pliers.
A toilet auger is used to remove any debris or clogs that may be preventing the seal from forming a tight fit. The auger is inserted into the toilet bowl and twisted to remove any debris, thus allowing the seal to form a better fit.
A putty knife is used to scrape off any old sealant that may be preventing the seal from forming a proper fit. The putty knife should be used with caution as it can damage the porcelain of the toilet.
A screwdriver is necessary to take apart the toilet tank and remove the seal. This is done by unscrewing the retaining nuts that keep the seal in place.
Finally, a pair of pliers should be used to help pry off the seal from the toilet tank. This is done by unscrewing the pliers and pulling the seal away from the tank. The pliers should be used with caution as they can damage the porcelain of the toilet tank.
By having the right tools available, testing a toilet seal is much simpler. With the proper tools in hand, it is possible to ensure the seal is in good condition and can last for years to come.
Preparing the Toilet for Testing
Testing a toilet seal is an important part of maintaining a healthy and properly functioning toilet. A seal can become worn or cracked over time, allowing water to leak out of the tank and potentially cause plumbing issues. Fortunately, testing and replacing a toilet seal is a relatively straightforward process that can be done in a few steps.
Before you begin, you should make sure you have the right tools for the job. You’ll need a flat-head screwdriver, a pair of pliers, a wrench, a pair of gloves, and a replacement seal. You’ll also need a bucket to catch any water that may leak out during the testing process.
Once you have all your tools ready, you’ll need to shut off the water supply to the toilet. There is usually a shut-off valve located near the base of the toilet. Once you’ve shut off the water supply, flush the toilet to empty it and prepare it for testing.
Next, you’ll need to remove the tank lid and unscrew the bolts that attach the tank to the bowl. Once the bolts are removed, you’ll be able to access the wax ring and the toilet seal. Inspect the wax ring and replace it if necessary. After that, inspect the toilet seal and check for any signs of cracking or wear. If the seal is in good condition, you’ll need to reinstall the tank and turn the water supply back on.
When you have finished testing the toilet seal, you can flush the toilet to make sure it is working properly. If you find any leaks during the testing process, you’ll need to replace the seal and re-test the toilet. With the right tools and a little patience, testing a toilet seal can be a simple process.
The Process of Testing a Toilet Seal
Testing a toilet seal might seem like a daunting task, but it is quite simple. To test a toilet seal, you will need a few supplies including a roll of toilet paper, a bucket of water, and a flashlight. First, you want to make sure the seal is in the right position. If it is off-center, it will need to be adjusted. Once the seal is properly aligned, it is time to start the testing process.
To begin, you will need to place the roll of toilet paper on the bowl and roll it around the rim to form a watertight seal. Once the seal has been created, you will then fill the bucket with water and pour it around the seal. If the seal is tight, the water will remain in the bucket. If not, you will need to adjust the seal and repeat the process.
Finally, you will need to use the flashlight to check for any gaps or cracks in the seal. If you can see light coming through any of the gaps, you will need to adjust the seal or replace it completely. With the right supplies and a bit of patience, you can easily test a toilet seal.
Troubleshooting Common Issues With Toilet Seals
A toilet seal is an essential component of a toilet, and its role is to keep the toilet watertight. Toilet seals are subject to wear and tear over time, and they will eventually need to be tested and replaced. Testing a toilet seal involves inspecting it for signs of damage or deterioration, and ensuring that it is properly sealed and functioning correctly. This article will discuss how to test a toilet seal, including troubleshooting common issues.
First, it’s important to understand the structure and function of a toilet seal. Toilet seals are typically made of rubber, and they are designed to create an airtight seal between the toilet bowl and the waste pipe. To test a toilet seal, start by inspecting it for signs of damage, such as cracks, tears, or discoloration. If the seal looks damaged, it should be replaced.
Next, check the seal for signs of leakage. To do this, pour a cup of water onto the seal and see if it seeps through. If the water seeps through, the seal is likely not functioning correctly and should be replaced. Additionally, you should check the seal for signs of water staining or discoloration, which can indicate a leak.
If the toilet is leaking from the sides, it may be due to an improperly installed seal. To check this, remove the seal and ensure that it is properly positioned against the toilet bowl and waste pipe. Additionally, make sure that the seal is properly secured so that it does not move when the toilet is flushed.
Finally, it’s important to check for an improper seal with a toilet wax ring. Toilet wax rings are designed to seal the gap between the toilet bowl and the waste pipe, and they should be replaced if they are not functioning correctly. To test the wax ring, flush the toilet and check for any leaks around the base of the toilet.
In conclusion, testing a toilet seal is an important part of maintaining a toilet. Inspecting the seal for damage, checking for leaks, and ensuring that the seal is properly installed are all important steps that should be taken to ensure that the toilet seal is functioning correctly.
Maintaining a Toilet Seal for Maximum Efficiency
Toilets are a necessary part of our daily lives, but without proper maintenance, they can become clogged and inefficient. One of the most important aspects of toilet maintenance is to check the seal between the toilet and the floor. This seal prevents leaks and keeps the water from pooling around the base of the toilet. Testing your toilet seal is an important part of ensuring that your toilet is working as efficiently as possible.
There are a few easy steps to test your toilet seal. The first is to ensure that the seal is in good condition, free of any damage or deterioration. Next, check to see if there are any gaps in the seal. If there are, you can use a putty knife or a caulking gun to fill in the gaps. Finally, make sure that the seal is properly sealed to the floor and that there are no gaps or cracks.
Once you’ve checked the seal, it’s important to make sure that it is in good working condition. To do this, pour a small amount of water around the base of the toilet and let it sit for a few minutes. If the water seeps into the gaps in the seal, it’s time to replace the seal. If not, your toilet is in good working condition and the seal is doing its job.
Testing your toilet seal regularly is an important part of ensuring that your toilet is working efficiently. By following these simple steps, you can ensure that your toilet is functioning properly and that the seal is keeping your home safe from leaks.
FAQs About the How Do You Test A Toilet Seal?
1. What materials are needed to test a toilet seal?
A: To test a toilet seal, you will need a few basic materials. These include a flashlight, a plumber’s putty or silicone caulk, and some paper towels.
2. How do I know if the toilet seal is leaking?
A: If you suspect your toilet seal is leaking, you can use a flashlight to inspect the area around the base of your toilet to check for signs of moisture. Additionally, you can place a few paper towels around the base of the toilet to see if any water collects on them.
3. Is it safe to use a sealant to repair a toilet seal?
A: Yes, it is safe to use a sealant to repair a toilet seal. Plumber’s putty or silicone caulk can be used to fill in any gaps or cracks in the seal and help prevent further leakage.
Conclusion
Testing a toilet seal is an important part of maintaining your toilet. It is important to inspect the seal periodically for signs of wear or damage. If the seal is damaged, it should be replaced to avoid leaking and water damage. To test a toilet seal, start by checking the seal area for any visible signs of wear or damage. Then flush the toilet and watch for any leaks. If you notice a leak, replace the seal right away. By testing your toilet seal regularly, you can ensure that your toilet is functioning properly and avoid costly repairs.