How To Replace Cast Iron Plumbing?
If you have an older home with an outdated plumbing system, you may want to consider replacing your cast iron plumbing. Cast iron is a durable material, but it can corrode over time, leading to leaks and other problems. Replacing your old cast iron plumbing with a newer, more efficient material is a great way to increase the longevity of your plumbing system. This article will provide an overview of the process for replacing cast iron plumbing, including the materials you will need and the steps involved.
Identifying Cast Iron Plumbing
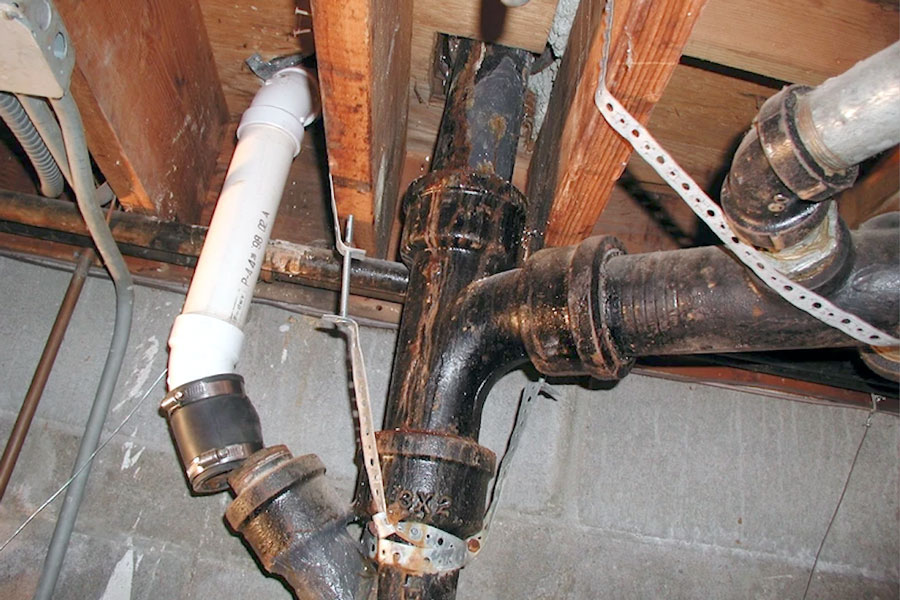
If you are planning to replace the cast iron pipes in your home, the first step is to correctly identify them. When inspecting your pipes, look for heavy, gray pipes that have a slightly rough surface. Cast iron pipes are often thicker than other materials used in plumbing, and they are typically painted with a black coating. Cast iron pipes are also known for their longevity and reliability, however, due to their age, they can be prone to corrosion.
To determine the exact type of pipe you have, you can use a magnet to check if the pipes are made of iron. If the magnet sticks, you are dealing with cast iron plumbing. If the magnet does not stick, it is likely made of another material such as copper or plastic. It’s important to understand the type of pipes you are working with before attempting to replace them.
Finally, if you are unsure of what type of pipes you have, you can always hire a professional plumber to inspect your plumbing system and advise you on the best course of action. By correctly identifying the pipes, you’ll be able to replace them safely and efficiently.
Safety Considerations for Working with Cast Iron Plumbing
When it comes to replacing cast iron plumbing, safety must be your top priority. This is because cast iron plumbing can be difficult to work with and is prone to cracking or leaking if not handled properly. Before attempting to replace any cast iron plumbing, it is important to be aware of the potential risks and take the necessary precautions to avoid injury.
First, you should always wear protective gear when working with cast iron plumbing. This includes goggles to protect your eyes, gloves to protect your hands, and a dust mask to protect your lungs from any particles created during the process. It is also important to use the proper tools for the job, as using the wrong tools can cause further damage to the pipes.
Second, cast iron plumbing can be heavy and awkward to work with so it is important to take measures to ensure your safety. This includes using a ladder or other support to reach higher pipes and using a trolley to move heavy pipes. Additionally, you should ensure that there is adequate ventilation in the area where you are working.
Finally, all of the old plumbing should be disposed of in a safe and responsible manner. It is important to contact your local waste disposal services to ensure that your old plumbing is disposed of in the proper way.
In conclusion, replacing cast iron plumbing is a job that requires a lot of safety considerations. From wearing the proper protective gear to disposing of the old plumbing correctly, taking the necessary safety measures can help ensure that the job is done correctly and safely.
Tools & Supplies for Replacing Cast Iron Plumbing
Replacing cast iron plumbing can be a daunting task, but with the right tools and supplies, it doesn’t have to be. The first step is to determine the type of cast iron plumbing that needs to be replaced. Is it cast iron soil pipe, or cast iron drain waste vent pipe, or maybe both? Once the type of pipe is identified, the next step is to gather the necessary tools and supplies. Depending on the type of cast iron pipe being replaced, some of the tools and supplies needed may include a pipe cutter, hacksaw blade, a drill and bit, a reciprocating saw, adjustable wrenches, a plunger, and a pipe wrench. Additionally, replacement parts such as connectors, couplings, and new pipes will be needed.
If the cast iron pipe is in difficult-to-reach areas, a flexible hose with a suitable length may be necessary to make the job easier. It is also important to purchase enough pipe to complete the job, as well as any additional supplies needed to finish the job, such as sealant, pipe insulation, and venting materials. Having the right supplies and tools on hand will make replacing cast iron plumbing a much easier task.
Steps to Replacing Cast Iron Plumbing
Replacing older cast iron plumbing is a daunting prospect for anyone who’s unfamiliar with the process, but it doesn’t have to be. With the right tools and some basic knowledge, you can successfully replace your old cast iron plumbing with new pipes. Follow these simple steps to replace your cast iron plumbing:
Start by shutting off the water supply and draining the pipes of any remaining water. Next, use a reciprocating saw to cut the cast iron pipes into pieces which can easily be removed. Once the old pipes are removed, use a level to ensure that the new pipes will be installed at the correct angle. Next, use a pipe cutter to cut the PVC pipes to the required length. After that, use a hacksaw to cut off any excess plastic from the ends of the pipes. Finally, use PVC cement to attach the new pipes to the existing connections.
Replacing cast iron plumbing may seem like a daunting project, but with the right tools and knowledge, it can be done quickly and easily. Taking the time to properly prepare and follow these steps will ensure that the new plumbing is installed correctly and that it will last for many years.
Sealing the New Plumbing Joints
Replacing cast iron plumbing can be a daunting task, but it is essential to maintain the integrity of your home’s plumbing system. Once you have successfully removed the old cast iron plumbing and installed the new pipes, it is important to properly seal the new plumbing joints. This will help to ensure that the connection is airtight and watertight, allowing for an efficient and safe pipe system.
The most important step in sealing the new plumbing joints is to use a high-quality sealant. It is important to ensure that the sealant is compatible with the type of pipe you are using and is the correct size for the joint. Once the sealant is applied, it is important to properly tighten the joint, using a wrench to create a strong, tight seal.
After the joint is tightened, it is important to inspect the area to ensure that the sealant has filled in any gaps or cracks in the joint. If there are any leaks, the sealant must be reapplied and the joint must be tightened again. Finally, it is important to check the joint for any leaks after a few hours to ensure that the connection is secure and leak-free.
By following these steps, you can ensure that your new plumbing joints are securely and properly sealed for years to come. It is important to use the highest quality sealant and to follow the instructions carefully when replacing cast iron plumbing to ensure the safety and integrity of your home’s plumbing system.
Finishing Touches for the Newly Replaced Plumbing
Replacing cast iron plumbing can be a daunting task, but it can be done successfully with the right tools and techniques. Once the cast iron plumbing has been replaced, there are a few finishing touches that should be taken to ensure everything is sealed properly and won’t cause leaks. This is the last step in the process of replacing your cast iron plumbing and it’s essential for a successful repair.
The first step in the finishing touches is to ensure all piping is properly sealed. This is done by using a plumbing sealant, such as plumber’s putty or silicone caulk. Plumber’s putty should be applied around the joints and connections of the piping, and silicone caulk should be applied around the perimeter of the pipe. Once the sealant has been applied, it should be allowed to dry completely before making the final connections.
The second step in the finishing touches is to make sure the valves and fittings are all properly connected. This is done by using a wrench to tighten the nuts and bolts to the recommended torque. Once the fittings have been properly tightened, the pipes should be pressure tested to ensure they are not leaking.
Finally, the newly replaced plumbing should be checked for any leaks. This can be done by running water through the pipes and examining them for any drips or leaks. If any are found, they should be sealed with plumber’s putty or silicone caulk.
Replacing cast iron plumbing can seem like a daunting task, but with the right tools and techniques, it can be done with relative ease. The final step, the finishing touches, is essential for a successful repair and should not be overlooked. Following these steps will ensure your newly replaced cast iron plumbing is properly sealed and will not cause any leaks.
FAQs About the How To Replace Cast Iron Plumbing?
Q1: What tools do I need to replace cast iron plumbing?
A1: You will need a hacksaw, a pipe cutter, a reciprocating saw, a pipe wrench, a pipe joint compound, a pipe fitting brush, a hammer, and a sledgehammer.
Q2: How do I properly connect new pipes to existing cast iron plumbing?
A2: Make sure to use a pipe fitting brush to clean the joint surfaces, apply a pipe joint compound, and connect the new pipes to the existing cast iron plumbing using a pipe wrench.
Q3: Is it necessary to use a professional to replace cast iron plumbing?
A3: It is not necessary to use a professional to replace cast iron plumbing, however, if you are not confident in your abilities, it is recommended to hire a professional to ensure that the job is done correctly.
Conclusion
Replacing cast iron plumbing may seem like a daunting task, but with the right tools and the right knowledge, it can be done relatively easily. It’s important to take the time to properly prepare and understand the process before attempting it. When done correctly, replacing cast iron plumbing can be a great way to update your plumbing system and ensure that it is up to date and functioning properly.