How Do You Fix A Broken Conduit?
A broken conduit can be a major problem, especially when it is located in an area that is difficult to access. It is important to take the necessary precautions when attempting to fix a broken conduit in order to ensure the safety of those involved. The most important thing is to first determine the cause of the break before attempting to fix it. Depending on the cause, the repair may involve replacing the broken sections, or replacing the entire conduit. In some cases, a professional may need to be called in to help with the repair. Once the repair is complete, it is important to test the conduit to ensure that it is working properly.
Identifying the Problem
Fixing a broken conduit can be a tricky and time-consuming task, but it doesn’t have to be daunting. The first step in the repair process is identifying the issue before you attempt to fix it. Common problems that can occur in conduits include wear and tear, corrosion, and improper installation. In order to determine the cause of the problem, you’ll need to check for signs of wear and tear, inspect the joints for corrosion, and review the installation process. It is also important to check for any obstructions inside the conduit that may have caused the issue. Once you’ve identified the problem, you can move on to the repair process.
Troubleshooting Common Causes of Conduit Breakage
Conduit breakage is a common problem for electrical contractors and DIYers. But what causes it, and how can you fix it? In this blog, we’ll look at the most common causes of conduit breakage and how to repair it.
The first step in troubleshooting a broken conduit is to identify the cause of the breakage. Common causes include physical damage, corrosion, and mechanical stress. Physical damage can be caused by installation errors, animals, or even weather conditions. Corrosion is usually caused by improper installation or the environment in which it is used. Mechanical stress can be caused by vibrations, temperature changes, and other factors.
Once you’ve identified the cause of the breakage, you can begin to repair it. For physical damage, the best course of action is to replace the conduit. For corrosion and mechanical stress, you may be able to repair the conduit with special compounds. If you’re not sure how to repair the conduit, it’s best to contact a professional electrician.
To prevent further breakage, you should also take steps to protect the conduit from future damage. This may include installing additional protection devices, such as conduit couplings or conduit supports. Alternatively, you can use special coatings to prevent corrosion and mechanical stress.
By understanding the common causes of conduit breakage and taking the necessary steps to repair it, you can ensure that your electrical system is safe and reliable.
Assessing the Damage and Safeguarding the Site
When a conduit breaks, it can cause significant damage to a property if not addressed quickly and safely. To properly fix a broken conduit, the first step is to assess the damage and take steps to safeguard the site. This can include taking steps to prevent further damage, such as shutting off power to the area. It is also important to ensure the safety of anyone nearby, as a broken conduit can create hazardous conditions.
For the next step, it is essential to identify the type of conduit that has broken and the extent of the damage. This will help determine the best course of action for remediation. Some conduits are easier to repair than others, and some can require specialized tools and expertise. Depending on the type of conduit, the repair may involve patching, replacing, or rerouting the conduit.
Once the broken conduit is identified and the extent of the damage is assessed, the next step is to begin the repair process. This usually involves cutting away the damaged portion of the conduit, cleaning up any debris, and then fitting new parts. It is important to take the time to properly assess the situation and ensure that all safety protocols are followed before beginning the repair process.
Finally, it is important to test the repaired conduit to make sure it is functioning properly and not leaking. There are several different tests that can be run to verify the integrity of the conduit. Testing the conduit is essential to ensure that further damage is not caused and to ensure that the repair was successful.
By taking the time to properly assess the damage, safeguard the site, and thoroughly test the repaired conduit, a broken conduit can be fixed quickly and safely.

Repairing or Replacing the Conduit
Broken conduit can be a costly and inconvenient issue for any homeowner. While you may feel the urge to fix the issue as quickly and cheaply as possible, it is important to first determine the best approach for the situation. Depending on the severity of the damage, repairing or replacing the conduit may be the best solution.
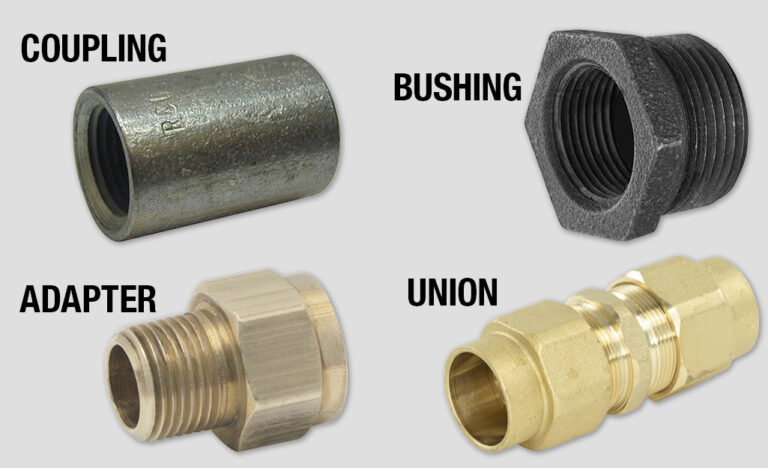
When repairing a broken conduit, it is important to use the appropriate materials and tools to ensure safety and prevent further damage. If the broken conduit is made of a plastic material, a repair coupling should be used to join the two pieces of conduit together. If the conduit is made of metal, a metal compression coupling should be used. It is also important to properly seal the coupling with a waterproof sealant to prevent moisture and debris from entering the new joint.
In some cases, it may be necessary to replace the broken conduit entirely. This is especially true if the conduit is severely damaged or is too old to be safely repaired. In this case, it is important to select the right conduit for the job, as different types of conduit are designed for specific applications. Once the new conduit is installed, it is important to make sure that all the connections are properly sealed to prevent future damage.
Whether you are repairing or replacing the broken conduit, it is important to take the time to do the job correctly. Doing so can save you time and money in the long run, and ensure that your conduit is functioning properly and safely.
Testing for Proper Function
A broken conduit is a serious issue as it could potentially lead to an electric shock or a fire hazard. Therefore, it is important to fix them as soon as possible. But before you can fix it, you need to identify the problem and determine the cause. Testing for proper functionality is the best way to do this.
You can use a multimeter to test the continuity of the wires and ensure that the electricity is flowing properly. This will help you find out if the broken conduit is the result of a bad conductor or a short circuit. You can also use an ohm meter to measure the resistance of the wires. If the resistance is too high, it could mean that the wire has been damaged or corroded.
In addition, visual inspections are also important when testing for proper functionality. Look for any signs of damage, such as frayed insulation, exposed metal, or corrosion. All of these can be signs of a broken conduit. If you find any of these, it’s best to replace the conduit immediately.
By testing for proper functionality and performing visual inspections, you can identify the cause of a broken conduit and take the necessary steps to repair it. This will help ensure that you can prevent any further damage and keep your home or workplace safe.
Preventative Maintenance
When it comes to keeping your conduit in top condition, the best approach is to practice preventive maintenance. Doing so can help you avoid costly repairs and extend the life of your conduit. Regular inspections of your conduit can help you identify small problems before they become large ones, and replace or repair the conduit if necessary. Inspect the conduit for signs of corrosion, wear and tear, or other damage that could potentially cause a breakdown. Additionally, it’s important to check the seal and insulation of the conduit to make sure that it is secure and won’t cause any further damage. Taking these steps can help prevent any future problems and keep your conduit in optimal condition.
FAQs About the How Do You Fix A Broken Conduit?
1. What do I need to fix a broken conduit?
You will need a replacement conduit, a screwdriver, and a wrench.
2. How do I remove the broken conduit?
You will need to unscrew the conduit from the wall using a screwdriver, and then disconnect it from the power source using a wrench.
3. How do I install the new conduit?
You will need to attach the new conduit to the wall using the screwdriver, and then reconnect it to the power source using the wrench. Make sure the connections are tight and secure.
Conclusion
Fixing a broken conduit requires that you have the right tools and the skills to use them properly. You must first identify the cause of the break, then you must cut away any damaged parts, and then replace those parts with new ones. If the conduit is broken due to corrosion, you may need to use a corrosion-resistant conduit. After the conduit is replaced, you must secure the connections and test to make sure the conduit is working properly. To ensure a successful repair, it is important to follow the manufacturer’s instructions and take all safety precautions.