How Do You Waterproof A Toilet Floor?
Waterproofing a toilet floor is an important yet often overlooked home maintenance task. Toilet floors are constantly exposed to moisture and water, so it is important to make sure the floor is sealed correctly to ensure a dry and comfortable bathroom space. Waterproofing the toilet floor will also help to protect the floor from any damage caused by water and ensure that the bathroom remains clean and hygienic. This guide outlines the steps to waterproof a toilet floor correctly and efficiently.
What Causes Toilet Floor Water Damage?
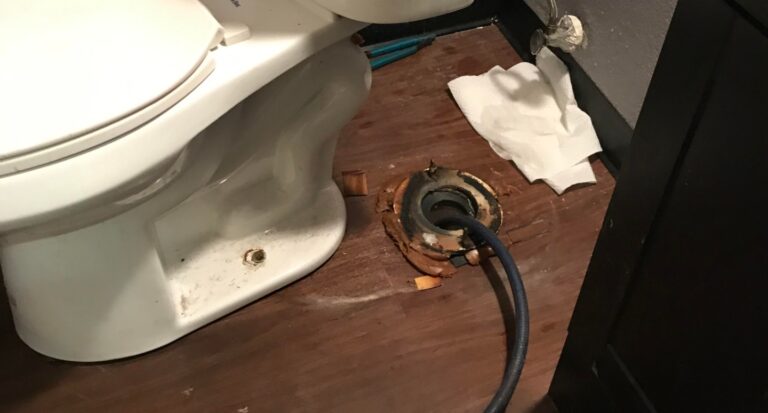
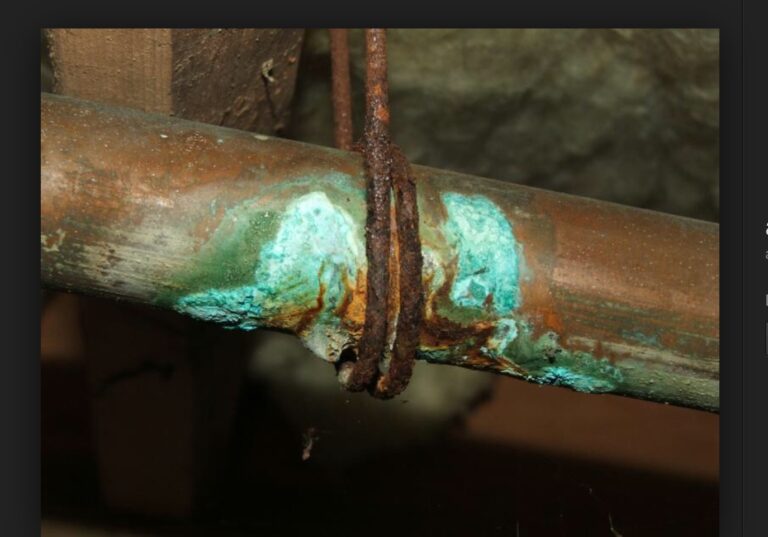
Toilet floor water damage can be caused by a number of issues, and is one of the most common problems homeowners face. Leaking pipes, faulty plumbing, or poor installation can all lead to water damage in your toilet area. In addition, things like clogged drains, a malfunctioning flapper, or a broken wax ring can cause water to seep through the floor. If left unattended, this can lead to major structural damage and costly repairs. To avoid this, it is important to understand the causes of water damage and how to waterproof your toilet floor.
Choosing the Right Sealant for Toilet Floor Waterproofing
The process of waterproofing your toilet floor can significantly reduce the chances of water damage or water leakage in your bathroom. The most important step when it comes to this process is choosing the right sealant. There are a few different types of sealants available on the market, and each one has its own benefits and drawbacks. Before selecting a sealant, it is important to consider the type of material your toilet floor is made out of, the size of your toilet, and the level of waterproofing you need.
Silicone sealants are the most commonly used option for waterproofing toilet floors. They are easy to apply, and provide a strong, waterproof seal when dry. However, silicone sealants cannot be used on certain materials, such as wood and tile.
Epoxy sealants are another option for waterproofing toilet floors. These sealants are extremely durable, and provide an excellent seal against water leakage. However, they require more preparation and they are more difficult to apply.
Polyurethane sealants are a great option for waterproofing toilet floors. They are easy to apply, provide a strong seal, and can be used on a variety of materials. The downside is that they are more expensive than other sealants, and they do not last as long.
When selecting a sealant for waterproofing your toilet floor, it is important to consider your needs and requirements, as well as the type of material your toilet floor is made out of. With the right sealant, you can ensure that your toilet floor is waterproof and protected from water damage.
Preparing the Toilet Floor for Waterproofing
When it comes to waterproofing a toilet floor, the most important step is preparation. Ensuring that the surface is clean and free of debris is essential. To begin, it is important to clear away any existing grout or caulk. If there are any gaps or cracks, they must be filled with a quality waterproofing compound. After the surface is clean and dry, it is recommended to use a good quality sealant to protect the surface from water damage. Once all of the surface is sealed, the area should be inspected for any remaining gaps or cracks. If any are found, they should be filled with a quality sealant as well. After the area is properly sealed, the toilet floor can now be waterproofed.

Applying the Sealant to the Toilet Floor
Waterproofing a toilet floor is a relatively simple process that can be done at home with the right materials. The first step is to purchase a quality sealant specifically designed for waterproofing bathrooms. This sealant is usually available in a variety of colors to match the décor of the room. Once the sealant has been purchased, the next step is to apply it to the toilet floor.
Start by cleaning the floor and removing any debris or residue that may have accumulated over time. Once the area is clean, use a putty knife to spread the sealant evenly over the entire surface of the floor. Ensure that the sealant is applied thinly and evenly to prevent a buildup of moisture. Use a damp cloth to wipe away any excess sealant.
Allow the sealant to dry completely before applying a second coat. This second coat should be applied in the same manner as the first. Allow the sealant to completely dry before using the toilet again.
Waterproofing the toilet floor offers a number of benefits. It prevents water damage to the floor, helps to prevent mold and mildew, and also helps to keep the bathroom sanitary. Taking the time to waterproof the toilet floor is an easy and inexpensive way to maintain the cleanliness and safety of the bathroom.
Maintenance Tips for Waterproofing a Toilet Floor
A properly waterproofed toilet floor is essential for any bathroom. It’s important to ensure that no water or moisture seeps through to the floor or other areas, as this can cause health and safety problems. Fortunately, this task is relatively easy to achieve. With the right materials and steps, you can make sure that your toilet is properly waterproofed and ready to use.
One of the most important steps to waterproofing a toilet is to ensure that the area is properly sealed. This is done by applying a waterproof sealant or membrane to the area around the toilet. This can be done either with a brush or a roller and should be left to dry before adding any additional materials.
In addition to sealing the area, it is also important to use a water-resistant grout. This should be applied between the floor and the walls, as well as around the edges of the toilet. This will help to keep moisture out and also provide additional strength and stability.
Finally, it is also important to use a waterproofing membrane on the floor beneath the toilet. This will act as a barrier to stop moisture from seeping through and damaging the floor. Once you’ve applied the membrane, you should then apply a sealant or paint to the surface of the floor to help protect it from any further moisture.
By following these steps, you can make sure that your toilet is properly waterproofed and ready for use. With the right materials and some basic DIY skills, you can easily maintain a waterproof toilet floor and keep it looking its best.
Troubleshooting Common Toilet Floor Waterproofing Issues
Waterproofing a toilet floor is an important part of any bathroom renovation. To ensure the longevity and prevent water damage, it’s important to properly waterproof the toilet floor. While waterproofing can be a tricky process, it’s not impossible. This article will help you troubleshoot common toilet floor waterproofing issues.
Start by inspecting the area for any leaks or damage. Depending on the age of the bathroom, you may need to repair or replace any cracked tile, grout, or caulk. It’s also important to check for any gaps in the sealant or caulk around the toilet. If present, these should be filled in with a waterproof sealant.
Once the area is prepped and repaired, it’s time to apply the waterproof sealant. There are many products available on the market, so make sure to read the instructions carefully and follow them closely. Using the wrong type of sealant could create more problems down the road.
Finally, you’ll want to test the sealant by pouring a small amount of water on the floor. If the water beads up, then the sealant has done its job and the floor is properly waterproofed. If not, you may need to reapply the sealant.
Waterproofing a toilet floor can be a daunting task, but with the right preparation and knowledge, you can ensure that your bathroom stays leak-free for years to come. Remember to always use the correct type of sealant and test your work to ensure that it’s done properly.
FAQs About the How Do You Waterproof A Toilet Floor?
1. What materials are most commonly used to waterproof a toilet floor?
A: The most commonly used materials for waterproofing a toilet floor are rubber, vinyl, and ceramic tiles.
2. Is it possible to waterproof floor without using any materials?
A: Yes, it is possible to waterproof a toilet floor without using any materials. Using a sealant such as a silicone-based product or a water-resistant epoxy can help to protect the floor from water damage.
3. How often should I check the waterproofing on my toilet floor?
A: It’s important to check the waterproofing on your toilet floor regularly to ensure it is still effective. Generally, it is recommended to check the waterproofing every six months as part of regular home maintenance.
Conclusion
Waterproofing is an important part of any bathroom renovation. It can help protect the floor from water damage and mold growth. There are several different methods for waterproofing a toilet floor, including using a waterproof membrane, sealant, or paint. It is important to properly prepare the area prior to applying the waterproofing product and to follow the manufacturer’s instructions carefully. With the right preparation and care, you can ensure that your toilet floor is properly waterproofed and protected for years to come.