How Do You Install A Water Softener In A Pre Plumbed House?
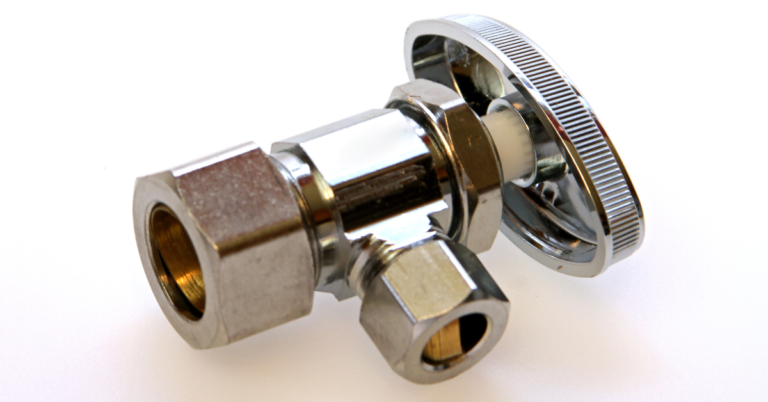
Installing a water softener in a pre-plumbed house can be a daunting task, but with the right information and tools, it can be a relatively simple process. First, you will need to identify the location of your incoming cold water line and then install a bypass valve. This will allow you to turn the water softener on and off without having to shut off the main water supply. Next, you will need to connect the water softener to the incoming cold water line and the bypass valve. Once the water softener is connected, you will need to install a drain line to the sewer. Finally, you will need to set the water softener for proper operation and check the system regularly for proper functioning. With the right preparation and knowledge, you can successfully install a water softener in a pre-plumbed house.
Understanding What a Water Softener Is
A water softener is a device that removes excess minerals from your water supply, making it easier for soap and detergent to work, and providing softer water for your home. Installing a water softener in a pre-plumbed house can be a challenge, as it requires a variety of different steps to be taken. Knowing how to install a water softener correctly is essential to ensure that it functions properly and that it is properly connected to the existing water supply.
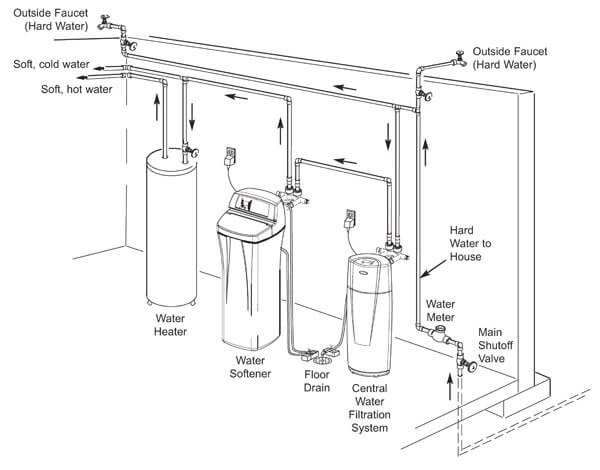
To begin, it is important to understand the plumbing setup of your home. You should locate the main water supply line, as this is the line that your water softener will be attached to. It is also important to identify the existing water pressure, so you can decide on the size of water softener you will need. Once these elements are identified, you can purchase a water softener that is designed to work with your existing plumbing setup.
Next, you will need to attach the water softener to the existing water supply. This involves using fittings and valves to ensure that the water softener is securely connected to the existing water supply. This is a complex procedure and you should consult a professional plumber if you are unsure how to do this correctly.
Once the water softener is connected, you will need to program the device to ensure that it works correctly. This involves setting the time and date, and selecting the appropriate water hardness settings. Once this is done, you can begin to enjoy the benefits of soft water in your home.
Assessing Your Home’s Plumbing System
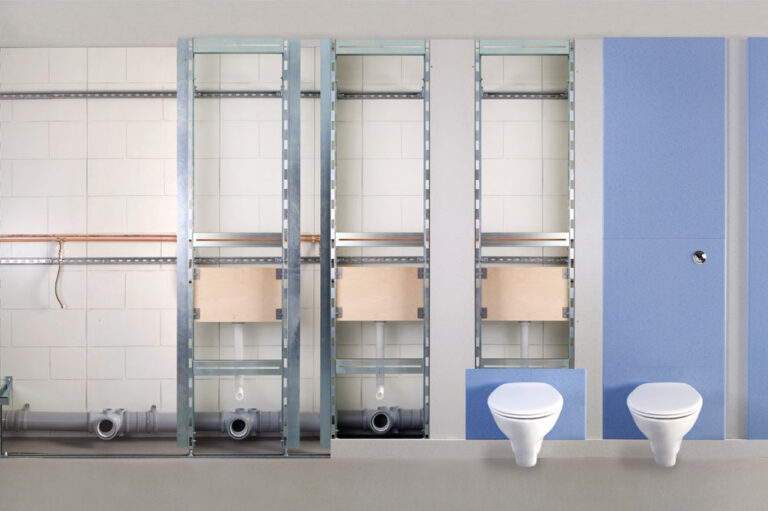
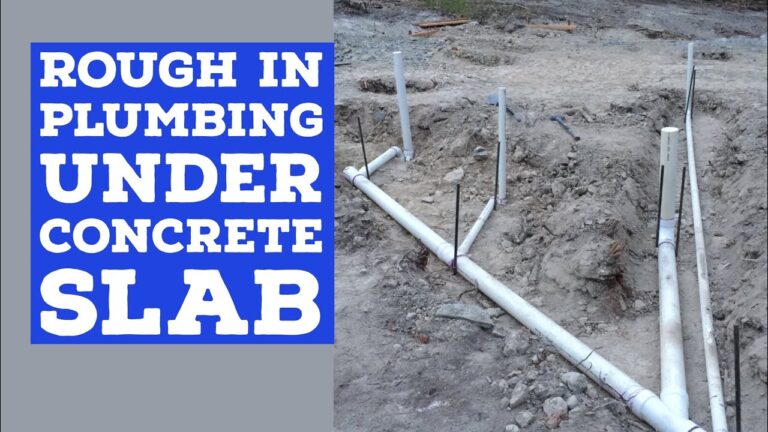
Installing a water softener in a pre plumbed house requires an understanding of the home’s plumbing system. Before beginning the installation process, it is important to assess the existing plumbing to determine the best approach for installing the water softener. It is also essential to make sure the water softener is compatible with the home’s existing plumbing system. A licensed plumber should be consulted to help assess the plumbing system and determine the most appropriate installation method for the water softener.
The plumbing system must also meet the requirements of the water softener. This includes making sure the water softener has the necessary access to the home’s water supply, and that the water softener is properly sized for the home’s water usage. It is also important to make sure the water softener is installed in a location where it can be easily accessed for maintenance, such as the basement or garage.
Once the plumbing system has been assessed and the water softener is found to be compatible, the installation process can begin. The installation process includes connecting the water softener to the home’s water supply, running the necessary plumbing, and making all necessary adjustments for optimal performance. It is recommended to have a professional plumber perform the installation process in order to ensure the water softener is properly installed and functioning properly.
Installing a water softener in a pre plumbed house can be a daunting task, but understanding the home’s existing plumbing system and the requirements of the water softener is the first step to ensure a successful installation. With the help of a professional plumber, the installation process can be completed with ease.
Understanding the Installation Process
Installing a water softener in a pre-plumbed house can be a tricky endeavor, especially for homeowners with little to no plumbing experience. However, with the right know-how, the process can be relatively easy. To help you understand the installation process, here are some key steps to follow.
The first step is to determine what type of water softener system you need for your home. Depending on the size of your home and the hardness of the water, you may need a single-tank or a multi-tank system. If you are unsure, it is best to consult a professional plumber.
The next step is to identify the location of the water softener. Generally, it should be placed near the main water supply line so that it can easily be connected to the pipes. Make sure to measure the available space before purchasing the system to ensure that it fits.
Once you have your system, it is time to install it. Depending on the type of system you have, you may need to install the tanks, the brine tank, and the control valve. Make sure to follow the manufacturer instructions carefully.
Finally, you need to connect the system to the existing plumbing. This is usually done with copper pipes and fittings. If you are unsure how to do this, it is best to hire a professional plumber.
Installing a water softener in a pre-plumbed house may seem intimidating, but with the right knowledge and a professional plumber, it can be relatively straightforward. By taking the time to identify the right system for your home and understand the installation process, you can successfully install a water softener system and enjoy the benefits of soft water.

Gaining Access to the Home’s Main Water Supply
Installing a water softener in a pre plumbed house can be a tricky task, as access to the home’s main water supply may be limited. To ensure your water softener is correctly installed, it is essential to gain access to the main water supply and complete the installation process.
The first step in gaining access is to shut off the water supply using the shut-off valve located near the main water supply. Then, you can move on to disconnecting the water lines from the main water supply and the water lines leading to the hot and cold water taps. Once these are disconnected, you can then install the water softener.
To ensure proper installation, it is important to make sure the water softener is connected to the main water supply and the water lines are properly connected to the hot and cold taps. Make sure that all connections are secure and there are no leaks. Once everything is properly connected, you can turn the water supply back on and test the water softener to make sure it is working correctly.
Installing a water softener in a pre plumbed house can be a difficult task, but if done correctly, it can provide your household with softened and quality water for years to come. Following the steps outlined above will help you ensure a successful installation.
Installing the Water Softener
Installing a water softener in a pre-plumbed house is a relatively straightforward process and can be completed by anyone with basic plumbing knowledge. The first step is to determine the location of the water softener. It should be placed in an area that is easily accessible and has adequate drainage. Once you have determined the location, you will need to install the water softener. You will need to connect the incoming water supply, the outgoing water supply, and the drain line to the water softener. Then, attach the brine tank to the water softener. Finally, connect the power supply to the water softener. Following these steps will ensure a successful installation of the water softener in your pre-plumbed house.
Finalizing the Installation and Testing the System
Once the water softener has been successfully installed and connected to the plumbing system, it is important to finalize the installation and ensure that the system is working correctly. This includes testing the system to ensure that it is providing clean water to the home. To do this, a water softener test kit should be used to check the hardness of the water. If the test results show that the water is still too hard, the system may need to be recalibrated or adjusted.
Once the water softener has been tested and adjusted, it is important to program the system so that it can monitor and regenerate automatically. This helps to ensure that the system is running efficiently and that it is providing the home with soft water on a regular basis. To program the system, the manufacturer’s instructions should be followed carefully. Once the system is programmed, it should be tested again to ensure that it is working properly.
Finally, it is important to check the system periodically to ensure that it is still working efficiently. This includes checking the settings, monitoring the water hardness levels, and replacing any worn parts. With regular maintenance, a water softener can last for many years and provide the home with soft, clean water.
FAQs About the How Do You Install A Water Softener In A Pre Plumbed House?
Q: What do I need to install a water softener in a pre-plumbed house?
A: You will need a water softener, a water supply line, a drain line for the water softener, a bypass valve, fittings to connect the water supply line and drain line to the water softener, and a wrench to tighten the fittings.
Q: What is the process for installing a water softener in a pre-plumbed house?
A: First, you will need to locate a suitable location for the water softener. Next, connect the water supply line and drain line to the water softener. Be sure to use the fittings provided and tighten them securely with a wrench. Finally, install the bypass valve and check for any leaks before turning on the water supply.
Q: How do I maintain a water softener in a pre-plumbed house?
A:To maintain a water softener in a pre-plumbed house, you will need to regularly check the water softener for any signs of damage or wear. You will also need to replace the filter periodically and add salt or potassium chloride to the softener as needed. Additionally, you should check the bypass valve to ensure it is functioning properly.
Conclusion
Installing a water softener in a pre-plumbed house is not as difficult as it may seem. With the right knowledge and tools, it can be done in a relatively short amount of time. By following the instructions in this guide, you should be able to install a water softener in a pre-plumbed house without any major problems. Remember to always use caution and follow safety guidelines when dealing with plumbing work. With the right precautions and care, you can have a water softener in your house in no time.