How Should A Water Softener Be Installed?
A water softener is a device that helps reduce hard water in a home or business. Hard water can cause buildup in pipes and appliances, and can leave behind a film on dishes and clothing. Installing a water softener can help reduce these issues, but it is important to understand how to properly install a water softener. This guide will provide an overview of the steps required to install a water softener, including where to locate the device, how to connect it to the plumbing, and how to set up the programming. With the right preparation and care, a water softener can be properly installed and help improve the water quality in your home or business.
Selecting the Right Water Softener
Finding the right water softener for your home is essential to ensure the optimal performance of your home’s plumbing. But picking the right water softener is only half the battle. Once you’ve selected the right one, it’s time to install it for optimal performance. Installing a water softener can be a tricky process, so it’s important to be well-informed and thoroughly prepared to get the job done right.
To ensure a successful installation, start by consulting a certified professional who can provide the necessary advice and guidance. The professional will be able to evaluate your plumbing system and determine the best way to install the water softener. They may also recommend additional upgrades or modifications to make sure the installation goes as smoothly as possible.
Once you’ve found a certified professional, it’s time to learn about the specific requirements for installing a water softener. This includes researching the necessary tools and materials, familiarizing yourself with the installation process, and obtaining the necessary permits and approvals. Additionally, you’ll need to decide where to install the water softener and how to connect it to your plumbing system.
Installing a water softener can be a complicated process, but with the right preparation and assistance, you can get the job done right and ensure that your home is equipped with the best water softening system.
Preparing the Installation Space
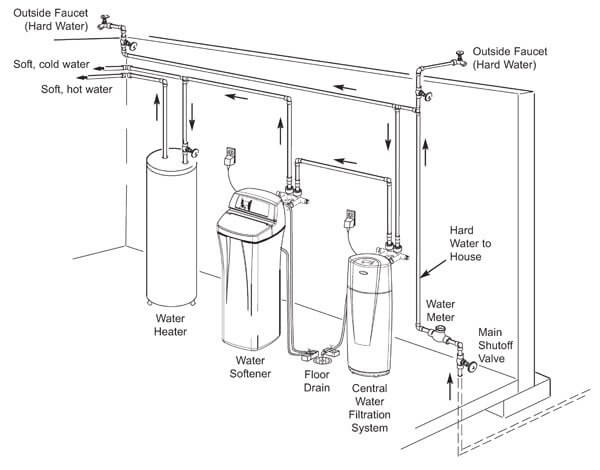
Making sure that the space you plan to install your water softener is suitable is essential for successful installation. First, you’ll need to measure the dimensions of the space and the size of the softener unit to ensure that it will fit. You should also choose a spot that is close to the main water line, as this will make the installation process easier. Make sure that the space is well-ventilated and dry, and away from any sources of heat, as this can damage the unit. Finally, you’ll need to check that the electrical outlets are working and have the appropriate power rating for the softener. Once the space is ready, you can begin the installation.
Connecting the Water Supply Line
Whether you’re installing a water softener at home or in a commercial facility, it’s essential to understand the connection process from start to finish. Connecting the water supply line is the first step in the installation process, and it’s important to get it right. This involves connecting the inlet and outlet pipes to the appliance.
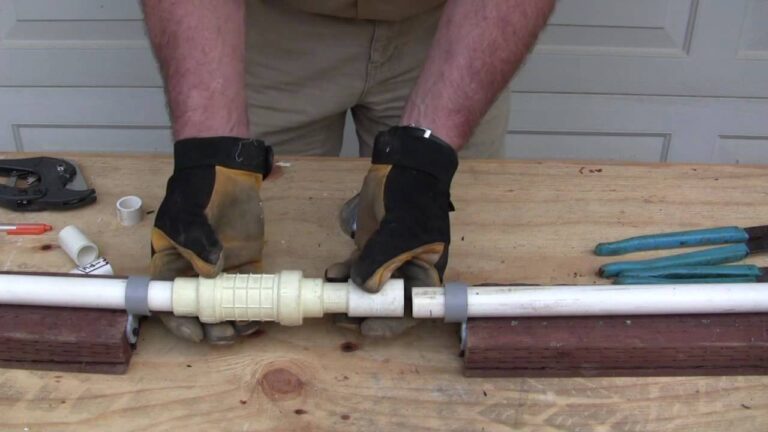
To begin, make sure the inlet and outlet pipes are the right size for the appliance. You should also check if the pipes are correctly aligned. Then, connect the supply line to the inlet pipe, and the drain line to the outlet pipe. Once the pipes are connected, the water softener is ready for use.
It’s important to note that the inlet and outlet pipes must be connected securely to the appliance. If they are not, the appliance may not function properly. To ensure a secure connection, use a wrench to tighten the pipes and screws.
When connecting the water supply line, it’s also important to check for leaks. If there are any, you should repair them immediately. Leaking pipes can cause water damage and lead to costly repairs.
Finally, make sure the water softener is connected to a power source. This will allow the appliance to operate properly and efficiently.
Installing a water softener is an important process that requires careful planning and attention to detail. By following the proper steps to connect the water supply line and checking for leaks, you can ensure the appliance is functioning optimally.

Installing the Brine Tank
Installing a water softener brine tank is an important step in getting your water softener system up and running. It is important to make sure that the brine tank is installed correctly in order to ensure the proper functioning of the softener. The brine tank should be placed in a level position, and it is essential to ensure that all connections are secure. Additionally, the brine tank should be connected to a drain so that the salty water can be disposed of safely.
When installing the brine tank, it is important to consider the size and capacity of the tank. The tank should be able to fit comfortably in the designated area, and should have enough capacity to store the required amount of salt. Additionally, the brine tank should be equipped with a safety valve in order to prevent an overflow of saltwater in the event of a malfunction.
Finally, once the brine tank is installed, it is important to test the system to make sure that it is functioning properly. This testing should include checking for any leaks, and making sure that the system is able to draw the required amount of salty water from the brine tank. Testing the system regularly is important in order to ensure that the water softener is functioning efficiently and effectively.
Connecting the Drain Line
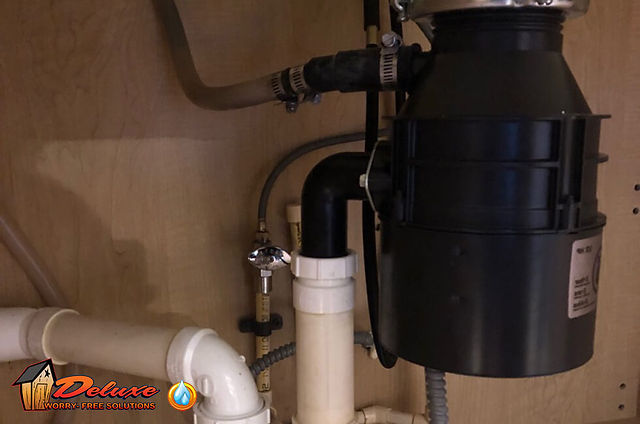
Installing a water softener is a common task for many homes. It is an important process in order to reduce hard water minerals and other contaminants from entering into the home. The first step in the process of installing a water softener is connecting the drain line. This involves attaching the drain line to the softener unit and connecting it to the home’s waste line. It is important to ensure that the drain line is properly connected to prevent any leaks or damage.
When connecting the drain line, it is important to use the correct size and type of pipe. This is to ensure that the water softener can handle the amount of water it needs to process. It is also important to make sure that the connection is secure and free of any loose connections. Additionally, it is important to ensure that there is sufficient space between the drain line and the wall to allow for proper flow of water.
Once the drain line is connected, the next step is to install the water softener unit. This involves ensuring that the unit is securely attached to the drain line and that the unit is properly connected to the home’s water supply. It is important to ensure that the unit is correctly wired and that all the connections are secure to prevent any leaks. Additionally, it is important to ensure that the unit is properly calibrated in order to ensure optimal performance.
By following these steps, the installation of a water softener should be a relatively straightforward process. It is important to ensure that the installation is done properly in order to ensure that the unit is fully functional and that it is safe and secure.
Programming the Water Softener
The installation of a water softener is an important aspect of ensuring your home has clean and healthy water. One component of a successful installation is programming the water softener. Doing this correctly is essential for the unit to work properly.
The first step in programming the water softener is to adjust the settings. This is done by entering the desired hardness level and the regeneration cycle. The hardness level is determined by the amount of calcium and magnesium in the water, while the regeneration cycle is the frequency with which the unit will regenerate itself.
The next step is to set the timer. This can be done manually or by using a digital timer. This timer will determine when the water softener will begin the regeneration cycle. Once the timer is set, the unit will automatically regenerate at the predetermined times.
Finally, it is important to check the water levels. This is done by testing the water with a hardness test strip. If the water is too hard, the water softener needs to be adjusted.
By following these steps, you can ensure that your water softener is properly programmed and running at its optimal performance. With a correctly programmed water softener, you can enjoy soft water and improved water quality in your home.
FAQs About the How Should A Water Softener Be Installed?
1. What type of plumbing does a water softener require?
A water softener requires the same type of plumbing as any other water-using appliance, such as a washing machine or dishwasher. It should be connected to a cold water line with a shut-off valve and a drain.
2. How often should a water softener be serviced?
A water softener should be serviced at least once a year, or more frequently if it is in an area with high levels of mineral content in the water supply. This will help to keep the system running at peak efficiency.
3. How long does it take to install a water softener?
The installation of a water softener typically takes between 2-3 hours, depending on the complexity of the system and the expertise of the installer.
Conclusion
A water softener should be installed by a professional to ensure that it is done properly and safely. This will help the water softener work more efficiently and last longer. Professional installation can also help to ensure that all parts are installed correctly, and that any potential problems can be addressed quickly. By ensuring that a water softener is installed correctly, homeowners can look forward to having a reliable and effective water softener for years to come.

