How To Add Plumbing To A Shed?
Adding plumbing to a shed can be a great addition to any outdoor space, especially if you’re planning on using the shed for activities that require water. Whether you want to use the shed as a workshop, a place to relax in the summer months, or a workshop for your gardening tools, adding plumbing can make the shed even more useful. This guide will help you understand the basics of adding plumbing to a shed, including the necessary materials, steps, and considerations.

Establish a Location for Plumbing Fixtures
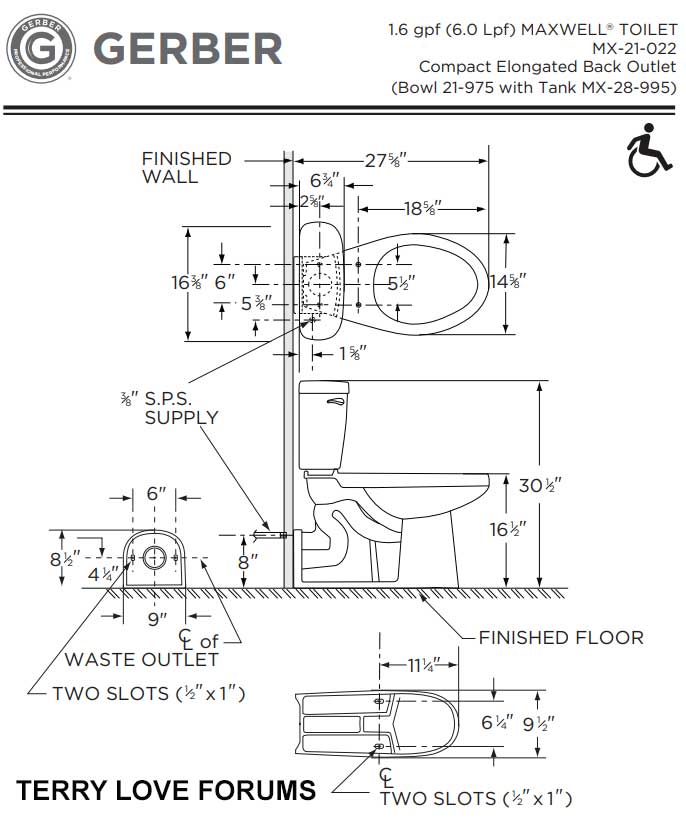
When it comes to plumbing fixtures, the location is key. Establishing the best location for plumbing fixtures not only ensures that the fixtures are installed correctly, but it also adds to the aesthetic of the room. Whether you are working with a sink, toilet, or shower, it’s important to consider the size of the fixture, the size of the room, and any existing plumbing connections. Once the right location is determined, the installation process can begin. Having a professional plumber help you with this process can ensure that the fixture is installed correctly and that you are satisfied with the end result.
Obtain Necessary Materials and Supplies
Having the right materials and supplies is essential to completing any project successfully. Whether you’re a professional contractor, a DIYer, or a student, having the right materials and supplies is the first step to a successful project. The key is to research the project and obtain the necessary materials and supplies before you get started. Make sure you have everything you need for the job, as it will save you time, money and headaches. It’s also important to take into account the quality of the materials and supplies, as this will determine the longevity and success of the project. Taking the time to find the right materials and supplies will pay off in the end.
Install the Water Supply Line
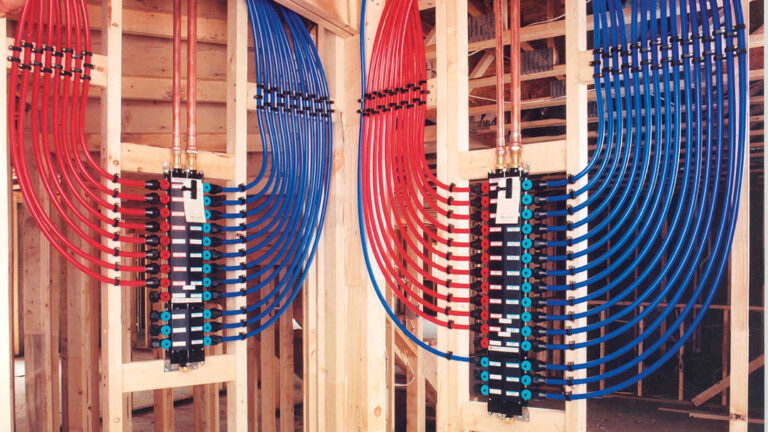
Installing a water supply line is an essential part of any home improvement project. It ensures that you have a dependable source of clean and safe water for your home. It is a relatively simple process, but it is important to take the time to do it right. The first step is to locate the main water supply line and shut off the water supply. Next, measure the area where you will need to install the new supply line and cut the pipe to size. After that, connect the new supply line to the main line and test for leaks. Finally, turn the water supply back on and enjoy the convenience of having a reliable source of water! With the right tools and a bit of patience, you can easily install your own water supply line.
Install Waste Lines
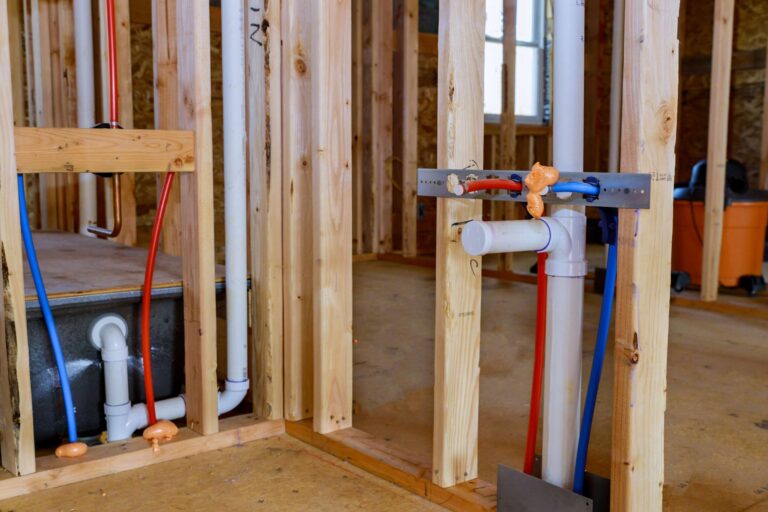
Installing waste lines is an important part of any plumbing system. It ensures proper drainage and prevents wastewater from backing up into your home or business. Waste lines are usually made of PVC or cast iron, with PVC being more common in newer homes. The installation process is relatively straightforward, but it’s important to follow safety protocols and understand what you’re doing in order to avoid any costly mistakes. By understanding and following the proper steps to install waste lines, you can ensure your plumbing system is efficient and reliable.
Connect Plumbing Fixtures
Connecting plumbing fixtures is an essential skill for any homeowner or DIYer. It requires knowledge and expertise in working with the various components and materials required. Knowing the right type of fittings and components to use for the job is key. It’s also important to understand the proper techniques for installing and connecting fixtures, including soldering, gluing, and tightening. With the right tools and knowledge, connecting plumbing fixtures can be a relatively easy task. Whether you’re replacing an existing fixture or installing a new one, having the right skills and tools can make the job go smoothly and help ensure a watertight seal.
Test Plumbing System for Leaks
A plumbing system should be regularly tested for leaks to prevent costly damage to properties. Leaks can cause serious problems such as mould, weakened foundations, and compromised water quality. It is important to take proactive measures in testing your plumbing system for leaks to ensure your home is safe and secure. With the right knowledge and tools, testing your plumbing system for leaks can be a simple and effective way to save time and money. Leaks can be prevented by regularly checking pipes, fixtures, and other components for visible signs of wear and tear. A professional plumber can also be consulted to inspect the system and determine if a leak is present. Taking the time to test your plumbing system for leaks can be a great investment for the safety and security of your property.
FAQs About the How To Add Plumbing To A Shed?
Q1. What kind of plumbing do I need to install in my shed?
A1. Depending on your shed’s purpose, you may need to install pipes and/or a toilet. If you are looking for a basic water supply, you will need to install a water line and a sink. For a toilet, you will need to install a waste pipe and the necessary fixtures.
Q2. What tools do I need to add plumbing to my shed?
A2. You will need a few basic tools for the job such as an adjustable wrench, a pipe wrench, a hacksaw, a level, and some plumbing tape. Depending on the type of plumbing you are installing, you may need additional tools as well.
Q3. Is it difficult to add plumbing to a shed?
A3. It can be, depending on your level of experience and the type of plumbing you are installing. If you are comfortable with basic plumbing tasks, it is possible to do it yourself. If you are uncertain, it is best to contact a professional plumber to ensure the job is done properly.
Conclusion
Adding plumbing to a shed is not a difficult task if you have the proper tools and knowledge. The most important part is to plan out the plumbing system and ensure that it meets local regulations and codes. It is important to use designated materials and make sure that all connections are sealed to avoid leaks and other issues. It is also important to consider the needs of any occupants, such as a bathroom or kitchen. With the right preparation, adding plumbing to a shed is a relatively uncomplicated process.