How To Plumb Coolant Expansion Tank?
Coolant expansion tanks, also known as overflow tanks, are essential components in any car’s cooling system. They are responsible for collecting excess coolant and maintaining the correct pressure in the radiator. Installing a coolant expansion tank is a relatively simple procedure that should only take a few hours. This article will explain the steps needed to correctly plumb a coolant expansion tank in your vehicle. First, you will need to purchase a coolant expansion tank that is compatible with your car’s make and model. Once you have the tank, you will need to locate its mounting location in the engine bay. Next, you will need to attach the coolant hoses to the tank, making sure to use the right size clamps. Finally, you will need to fill the tank with coolant and bleed any air out of the system. With these steps, you should be able to successfully plumb a coolant expansion tank in your vehicle.
Overview of Coolant Expansion Tank
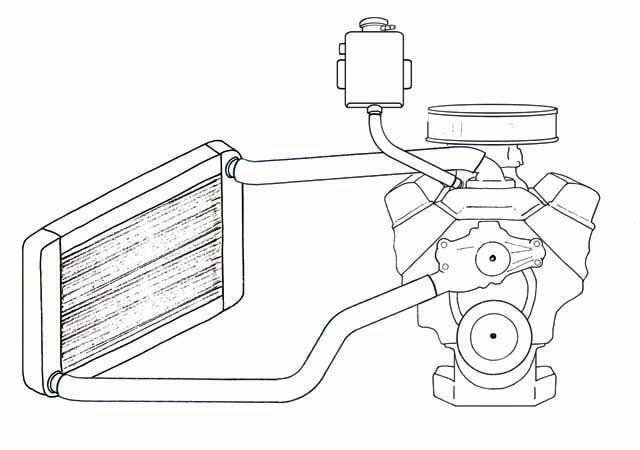
The coolant expansion tank is an integral part of any vehicle’s cooling system, providing much-needed storage space for coolant and air. The tank is responsible for maintaining the right balance between coolant and air in the cooling system, ensuring the engine runs at its optimum temperature. The expansion tank also works as a pressure regulator, allowing the system to expand and contract as the engine heats up and cools down. Without an expansion tank, the cooling system may be prone to pressure fluctuations resulting in a decreased engine performance. To ensure a smooth running engine, it’s important to check the coolant expansion tank regularly for any signs of damage or leaks.
Types of Expansion Tanks
Expansion tanks are an important component of any plumbing system, as they help regulate the pressure within the system. They come in a variety of types, each designed for specific applications. The most common type of expansion tank is the diaphragm tank. This type uses a flexible membrane to separate the air from the water, which helps to absorb excess pressure. Another type of expansion tank is the bladder tank, which uses a rubber bladder to separate the air from the water. Bladder tanks are often used in high-pressure systems, as they can hold more water than their diaphragm counterparts. Lastly, there are the combination tanks, which use both a diaphragm and a bladder to provide an even better pressure regulation system. With the right expansion tank for your system, you can ensure that your plumbing is working as efficiently as possible.
Tools and Materials Needed
A successful blog post requires more than just words on a page. To get the most out of your blog, it’s important to have the right tools and materials. These include a good writing platform such as Microsoft Word or Google Docs, an SEO-friendly blog hosting platform such as WordPress or Blogger, and a variety of plugins and other tools to help with optimizing and promoting your blog. Additionally, if you want to take your blog to the next level, you’ll need to invest in a few other materials such as web design, graphics, and even video production. All of these materials are important for writing, optimizing, promoting, and even monetizing your blog. Investing in the right tools and materials can help you create a successful blog that will reach your audience and help you achieve your goals.
Preparing to Install the Expansion Tank
Installing an expansion tank is an important step when it comes to the plumbing of your home. Expansion tanks reduce the stress on your water heater and water lines by allowing excess water to be stored safely until it is needed. Proper installation of the tank is essential for it to work properly. This blog will provide you with the necessary steps to prepare for the installation of an expansion tank.
First, you will need to determine the size of the tank you need. Measure the area where the tank will be installed, taking into account the size of the pipes that are connected to it. Next, you will need to purchase the appropriate size expansion tank. Once the tank is purchased, the next step is to shut off the water to the house. This will help to ensure that no water is spilled during the installation process. Finally, it is important to read the instructions that come with the expansion tank and make sure that you are familiar with the installation process. Following these steps will help you ensure that your expansion tank is installed properly.
Installing the Expansion Tank
Installing an expansion tank is an important step when it comes to keeping your plumbing system in top condition. Expansion tanks are designed to absorb the increased pressure caused by thermal expansion of the water in your pipes. By doing so, the tank prevents your plumbing system from becoming over-pressurized, which can cause damage to pipes and other fixtures. Installing an expansion tank is relatively simple and can be done in just a few steps. With the right tools and a bit of know-how, you can ensure that your plumbing system is prepared for any sudden changes in water pressure. Investing in an expansion tank today can help you avoid costly repairs in the future.
Maintenance and Troubleshooting Tips
This blog section provides helpful advice for maintaining and troubleshooting all kinds of equipment. From regular checkups to deep dives into specific components, our tips are designed to help you keep your gear running smoothly for years to come. With advice from experienced technicians, you’ll be able to diagnose and fix problems quickly and efficiently. Learn the best practices for keeping your gear in top shape, and prevent costly repairs in the future. Whether you’re a beginner or a pro, our Maintenance and Troubleshooting Tips blog can help you get the most out of your equipment.
FAQs About the How To Plumb Coolant Expansion Tank?
1. What type of tubing should I use to plumb my coolant expansion tank?
A: It is important to use a high quality, non-corrosive tubing when plumbing a coolant expansion tank. Commonly used materials include silicone, aluminum, or stainless steel.
2. How do I ensure a proper seal when connecting the expansion tank to the radiator?
A: Make sure the connections are clean and dry before applying a sealant to the threads. Once the sealant has been applied, hand-tighten the connection and then use a wrench to ensure a proper seal.
3. How often should I check the coolant level in the expansion tank?
A: It is recommended to check the coolant level in the expansion tank at least once a month. If the coolant level is low, top it off with a 50/50 mix of coolant and water.
Conclusion
Installing a coolant expansion tank is not a difficult process and can be done with simple tools. It is important to ensure that all connections are tight and that all air pockets are removed. Following these simple steps should ensure a successful and safe installation. By properly plumbed, the coolant expansion tank will help to maintain the cooling system’s pressure and prevent any potential problems due to boiling coolant.