How To Repair Plumbing Under Slab?
Repairing plumbing under a slab is a complex process that requires extensive knowledge and experience. The process involves breaking up the concrete slab or foundation to gain access to the plumbing, followed by cutting out the damaged section and replacing it with a new section of pipe. In addition to the technical aspects of the repair, it is important to have a thorough understanding of the local building codes and regulations that may affect the repair process. Furthermore, it is essential to make sure the repair is done correctly so that it is safe and long-lasting. With the proper knowledge and experience, it is possible to make successful repairs to plumbing under a slab.
Overview of Plumbing Under Slab
When plumbing is located under a slab, it can often be difficult to repair. In order to properly repair plumbing under slab, it’s important to understand how it’s installed and how best to access it. This article will provide you with a comprehensive overview of plumbing under slab repair, including the tools and steps necessary for the job.
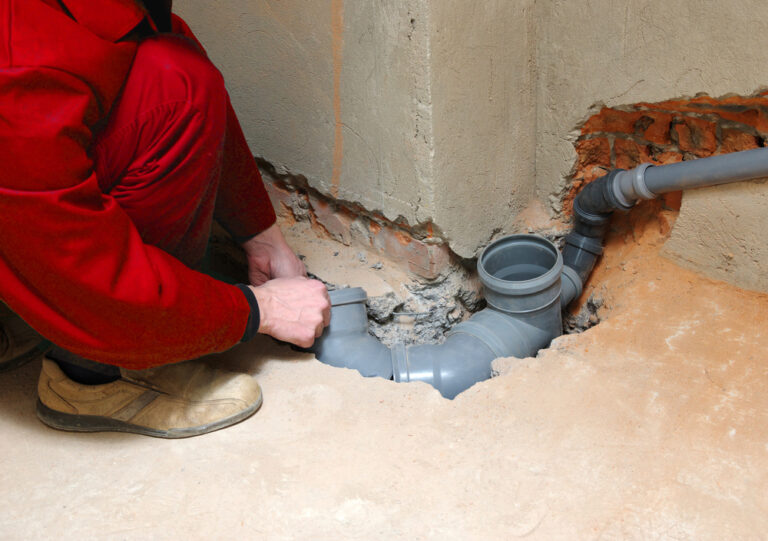
First, identify the problem. You’ll need to determine if the issue is due to a broken pipe, a loose fitting, a blockage, or something else. Once you’ve identified the problem, you’ll need to determine the best way to access it. This could involve digging up the slab, or cutting out a section of the slab.
Once you’ve gained access to the plumbing, you’ll need to assess the damage. You may need to replace a section of pipe, or repair a loose fitting. It’s important to use the right tools and materials for the job. This could include a pipe cutter, wrenches, a snake, and a variety of plumbing supplies.
After the repair has been completed, you’ll need to test the plumbing to ensure it’s working properly. This includes flushing out the lines, testing the pressure, and checking for any leaks. Once you’re sure the repair is complete, you’ll need to patch up the slab and reinstall any fixtures you may have removed.
Finally, take the time to inspect your plumbing on a regular basis to prevent any future issues. This could include checking for leaks, inspecting the pipes for any signs of corrosion, or cleaning out the drains. Doing so will help keep your plumbing in tip-top shape and save you from costly repairs down the road.
Identification of Problem
Plumbing problems under the slab can be a difficult and complex task due to the fact that it is difficult to access and identify the source. In order to be able to effectively repair plumbing under the slab, it is important to properly identify the problem. Proper identification of the problem will help determine the best repair options and ensure that the repairs are done in a timely and cost-effective manner.
One of the most important aspects of identifying plumbing problems under the slab is to understand the foundation of the building. If the foundation is made of concrete slab or a raised foundation, the plumbing system will be different and require different approaches for repair. It is also important to consider the type of plumbing system, including the pipes, fixtures, and other components, that are in place and whether any of them have been damaged.
Inspection of the plumbing system is also important in order to identify any potential problems. Inspections can include visual inspections, using a camera to inspect the pipes, and/or using a specialized tool to detect any problems. Additionally, testing the water pressure can also help to identify any issues.
Once the problem has been identified, the next step is to determine the best method for repair. This will depend on the type of plumbing system, the severity of the damage, and the budget. It is important to consult a professional plumber in order to ensure that the repairs are done properly and in a timely manner.
Preparation for Slab Repair
When it comes to repairing plumbing under a slab, preparation is key. Before starting any repair work, it is essential to ensure that the area is properly prepared. This includes removing any debris from the slab so that the repair is properly carried out. Additionally, all fixtures and pipes should be inspected for any damage or signs of corrosion. Once the area is ready, the repair process can begin.
The first step in the repair process is to remove any existing pipes or fixtures. This can be done with a saw or other cutting tool. Once the pipes and fixtures are removed, the area should be cleaned thoroughly. This includes removing any build-up of dirt, dust, and debris.
The next step is to inspect the area for any signs of damage or corrosion. If any is found, it should be addressed before the repair process begins. Additionally, any cracks in the slab should be filled with a sealant to prevent further damage.
Once the area is prepared, pipes and fixtures can be replaced or repaired. This can involve replacing broken pipes or fixtures, fixing leaking connections, or replacing corroded pipes. It is important to ensure that all connections are properly sealed to prevent further leaks.
Finally, the area should be tested for leaks. This can be done by running water through the pipes and checking for any signs of leakage. If any leaks are found, they should be addressed before the repair process is completed.
By properly preparing the area and inspecting for any signs of damage or corrosion, the repair process can be carried out safely and effectively. With proper preparation and care, any plumbing under a slab can be successfully repaired.

Procedures for Repair
When it comes to repairing plumbing under slab, the process can be complex and time-consuming. However, it is important to understand the steps and procedures involved to ensure a successful repair. The first step in the process is to locate the slab leak and to do this, a thorough inspection of the area needs to be conducted. This will include using a range of different tools and techniques, such as a water pressure gauge, a thermal imaging camera, and a moisture meter to identify the source of the leak. Once the source has been identified, the next step is to repair the plumbing. This could include replacing or repairing broken or loose pipes, sealing off damaged joints, and addressing any other issues that may be causing the leak.
After the repairs have been completed, the area needs to be checked for water tightness. This can be achieved by using a water pressure test to identify any potential leaks that may have been missed during the inspection. If the area is not water tight, additional repairs must be made to ensure the leak has been completely sealed. Finally, the repaired area should be monitored for any future leaks to ensure that the repairs have been successful. By completing these steps and procedures, you can be confident that your plumbing under slab has been repaired effectively and safely.
Potential Hazards and Safety Considerations
When repairing plumbing underneath a slab, it is important to consider the potential hazards and safety considerations that come with the job. Before starting, it is essential to have a comprehensive understanding of the possible risks associated with a plumbing repair job. To begin with, it is important to ensure that the plumbing system is properly ventilated, as a lack of ventilation can lead to an accumulation of hazardous gases like carbon monoxide. Additionally, if the slab is made of concrete, it is important to wear protective gear such as gloves, goggles, and a dust mask to avoid contact with dust and debris that could be hazardous. Moreover, it is essential to have the right tools and materials to make a successful repair. For instance, a pipe wrench is necessary to loosen fittings, and a hacksaw is necessary to cut the pipes. Finally, it is important to be aware of the local plumbing codes and regulations to ensure that the repair job will be up to code. By understanding the potential hazards and safety considerations associated with repairing plumbing under a slab, homeowners can avoid costly repairs in the future.
FAQs About the How To Repair Plumbing Under Slab?
1. What type of tools and materials are needed to repair plumbing under a slab?
Answer: Tools and materials needed for repair plumbing under a slab include a pre-bent PVC pipe, PVC couplings, PVC primer and glue, a hacksaw, a utility knife, a shovel, and a power drill.
2. What is the process to repair plumbing under a slab?
Answer: The process to repair plumbing under a slab typically involves cutting out the damaged section of the pipe, fitting a pre-bent PVC pipe in its place, and using PVC couplings and primer and glue to secure the connection.
3. How long does it take to repair plumbing under a slab?
Answer: The time it takes to repair plumbing under a slab can vary depending on the amount of damage and the complexity of the repairs. Generally, it can take anywhere from one to three hours.
Conclusion
The process of repairing plumbing under a slab can be a complicated and costly task. However, with the right tools and materials, it can be done. Before starting any repairs, it is important to identify the source of the issue and then make sure that the area is properly prepared. This includes cutting out the damaged section, cleaning the area, and making sure that the new pipe is properly aligned. Once the repair is complete, it is important to check for any leaks or other issues. With the proper preparation and care, plumbing under a slab can be repaired and restored.