Rv Holding Tank Plumbing Diagram
An RV Holding Tank Plumbing Diagram is a visual guide that shows how the plumbing system of a recreational vehicle is set up and connected. This diagram can be very helpful for RV owners who are considering a DIY plumbing project or for professional plumbers who are diagnosing a problem with the RV’s plumbing system. Holding tank plumbing diagrams will show the different components of the plumbing system and how they are connected, allowing the user to determine potential problems and solutions. It is important to use the correct diagram for your RV, as the plumbing setup can vary from model to model.
Overview of RV Holding Tank Plumbing
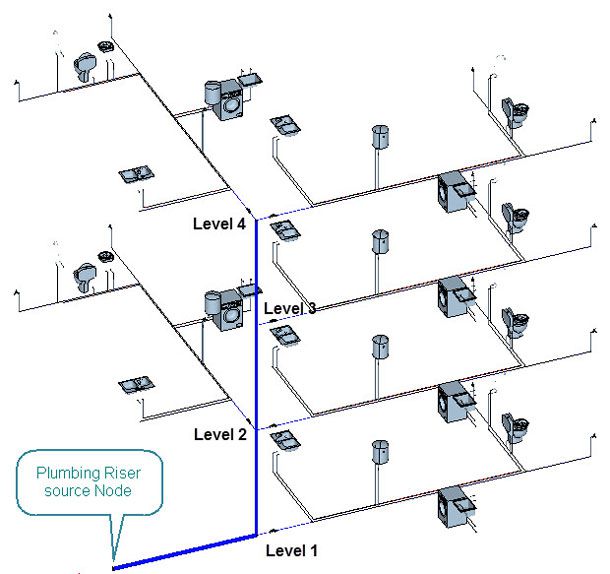
For those who are out on the open road, RV holding tank plumbing is an essential part of their experience. Knowing how to maintain this system and interpret a diagram is key to a smooth-running RV. An RV holding tank plumbing diagram describes how RV waste is moved from the RV to the sewer system and how the holding tanks are connected.
RV holding tank plumbing typically consists of three tanks, each with its purpose. The gray water tank collects wastewater from sinks and showers, while the black water tank stores sewage from the toilet. Meanwhile, the freshwater tank stores potable water for drinking, cooking, and cleaning. Each tank is connected to a system of pipes and valves.
Understanding an RV holding tank plumbing diagram is key to being able to identify and troubleshoot any problems that may arise. It’s important to know the location of each tank, the layout of the plumbing, and the valve setup to properly maintain the system. It’s also important to ensure that the tanks are properly vented and that there is a backflow valve to protect the RV from any possible sewage backup.
For those who are planning to hit the road in an RV, having an understanding of RV holding tank plumbing and its diagrams is essential for a safe and enjoyable journey. With the right knowledge and maintenance, an RV will provide a comfortable home on the open road.
Components of an RV Holding Tank System
An RV holding tank system consists of several components that allow for the storage and disposal of waste. These components include the RV holding tanks, the plumbing lines, the valves, and the fittings. Each of these components has a specific purpose and understanding how they work together is essential for proper operation and maintenance of the RV holding tank system.
The RV holding tanks are typically made of plastic or fiberglass and come in various sizes. They are used to store the wastewater and solid waste from the RV until it is disposed of. The plumbing lines are connected to the RV holding tanks and allow the waste to be moved from one tank to another. Valves and fittings are also installed to regulate the flow of wastewater and solid waste.
In addition to the various components, a sanitation system may also be included in the RV holding tank system. The sanitation system is designed to break down solid waste and prevent clogs and backups in the plumbing lines. A filter is also required to ensure that any bacteria is removed from the wastewater before it is discharged.
By understanding the components of an RV holding tank system, it is possible to ensure that the system is functioning properly and that all of the components are performing their intended purpose. With proper maintenance, the RV holding tank system can provide years of reliable service.
Identifying the Parts of an RV Holding Tank Plumbing Diagram
If you’ve ever owned an RV, then you know that the plumbing system, in particular, can be quite complex. Understanding the components of an RV holding tank plumbing diagram can help you make more informed decisions about repairs and maintenance, as well as give you a better overall knowledge of how your RV works. This article will provide an in-depth look at the various parts of an RV’s plumbing system, starting with the holding tank plumbing diagram.
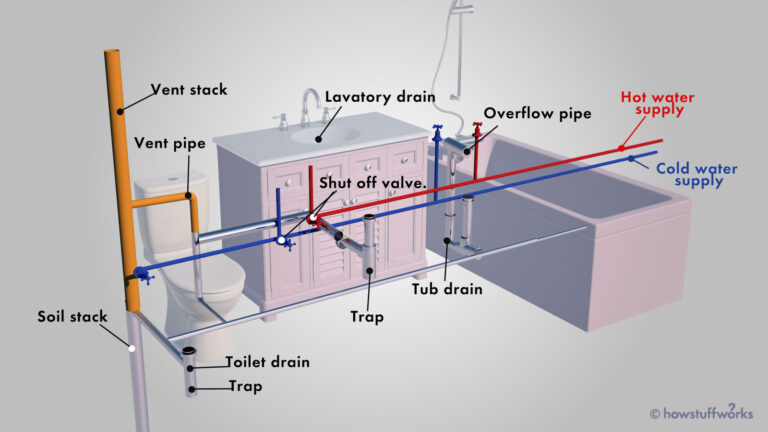
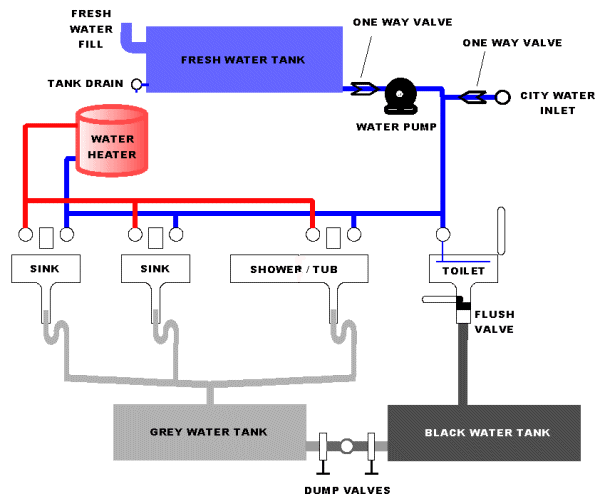
The RV holding tank plumbing diagram shows the main components of the RV’s plumbing system, including the fresh water tank, grey water tank, and black water tank. It also shows the plumbing lines that connect to each of the tanks, the water pump, and the drain valves. Additionally, the diagram will show the various fixtures and plumbing fixtures that are connected to the RV plumbing system.
The freshwater tank is the main source of water for the RV. It is connected to the water pump, which pumps the water throughout the RV. The grey water tank catches the water from the sink, shower, and bathroom fixtures, and the black water tank collects the wastewater from the toilet. The water is then drained from the tanks through the drain valves.
Finally, the RV holding tank plumbing diagram also shows the water heater, the water filter, and the water pressure regulator. The water heater is used to heat the water for the RV’s plumbing system, while the water filter helps to ensure that the water is clean and free of impurities. The water pressure regulator is used to regulate the pressure of the water in the plumbing system.
By understanding the parts of an RV holding tank plumbing diagram, you can better understand the workings of your RV’s plumbing system. With this knowledge, you can make more informed decisions about repairs and maintenance, and ensure that you are getting the most out of your RV’s plumbing system.
Steps to Install an RV Holding Tank System
Installing a holding tank system for an RV is a great way to extend your camping trips and enjoy the outdoors. Whether you’re a first-time DIYer or a veteran RV enthusiast, understanding the correct plumbing diagram for your RV holding tank is essential for a successful installation.
The first step is to determine the size, type, and capacity of your holding tank. This should be based on your RV’s size and the amount of water storage you require. Once you’ve identified the tank, you’ll need to map out the sewer line. This includes connecting the tank to the RV waste outlet, allowing for appropriate drainage.
Next, you’ll need to run a vent line from the holding tank, which will allow air to escape from the tank when it is full. This is a crucial step, as it will help to ensure that the tank won’t burst or become damaged due to the pressure build-up inside.
Finally, you’ll need to install the tank itself. This involves connecting it to the RV waste outlet, running the vent line, and ensuring that all the connections are secure. It’s also important to make sure that the tank is properly sealed to prevent any leaks. Once all the connections are secure and the tank is in place, you’re ready to use it.
By following these steps and understanding the plumbing diagram for your RV holding tank, you’ll be able to confidently install a system that will provide you and your family with a safe and reliable way to extend your camping trips.
Maintenance of an RV Holding Tank System
RV holding tanks are a critical component of the RVing experience. Without them, it would be impossible to store and dispose of wastewater, and ultimately enjoy a comfortable and sanitary camping experience. With the right maintenance, an RV holding tank system can last for years and provide a safe and clean environment for you and your family.
To ensure the longevity of your RV holding tank system, it’s important to know what the plumbing diagram looks like and how it works. A typical RV holding tank system includes a collection tank, a drain line, a vent line, and a water line. Understanding each of these components and how they interact with each other is essential to proper maintenance.
The collection tank stores and collects wastewater from the RV’s fixtures and tanks. The drain line is the pipe or hose that connects the collection tank to the RV’s sewer hookup. The vent line is used to release air from the tank and prevent a vacuum from forming. Finally, the water line is the pipe or hose that connects the holding tank to the RV’s water supply.
To ensure your RV holding tank system functions properly, it’s important to conduct regular maintenance and inspections. This includes removing any debris or other material that has been collected in the tank, checking the vent line for clogs or blockages, checking the water line for leaks, and inspecting the drain line for any signs of wear and tear. Additionally, it’s important to keep the tank free of any foreign material, such as grease or food particles.
By understanding the plumbing diagram of an RV holding tank system and performing regular maintenance, you can ensure that your RV holding tank system will continue to function properly and last for years to come.
Troubleshooting Common Problems with RV Holding Tank Systems
When it comes to RV plumbing, the holding tanks are the lifeblood of the system. Without a properly functioning holding tank, water can’t flow and waste won’t be properly disposed of. That’s why it’s important to understand the RV holding tank plumbing diagram. Knowing this diagram can help you identify and troubleshoot any potential issues with your RV’s plumbing system.
When it comes to RV plumbing, there are three components – the fresh water tank, the grey water tank, and the black water tank. Each of these tanks will have its plumbing system, and understanding how they interconnect is key to troubleshooting any issues that may arise. The freshwater tank is where your drinking water is stored, and it is connected to the faucet and shower. The grey water tank is connected to the kitchen sink and bathroom sink and collects wastewater from these. Lastly, the black water tank is connected to the toilet and collects wastewater from it.
When troubleshooting any potential problems with your RV’s plumbing system, it’s important to look at the RV holding tank plumbing diagram. This can help you identify potential leaks, blockages, or other issues that may be causing the problem. It is also important to properly maintain your RV’s plumbing system, including regularly inspecting the holding tanks and their plumbing connections. Doing so can help you avoid costly repairs and keep your RV’s plumbing system functioning optimally.
FAQs About the RV Holding Tank Plumbing Diagram
1. How do I know what size holding tank I need for my RV?
Answer: The size of the holding tank you need depends on the size and layout of your RV, as well as the type of waste you plan to store. Consult a plumbing expert or RV retailer for more information.
2. How often should I empty my RV holding tanks?
Answer: The frequency of emptying your RV holding tanks will depend on the size of the tank and the amount of use it gets. Generally, it is recommended to empty the tanks at least once a month.
3. What are the benefits of having a plumbing diagram for my RV holding tank?
Answer: Having a plumbing diagram for your RV holding tank can help you understand the layout of the tank and the connections between pipes and valves. This can be particularly useful if you ever need to repair or replace any parts.
Conclusion
The RV holding tank plumbing diagram provides a great overview of how the plumbing system works in an RV. It shows the various components that make up the system, including the tank, valves, and hoses. By understanding how the system works, RV owners can better maintain their vehicles and keep them running smoothly.