How Do You Repair A Pipe With Putty?
Repairing a broken pipe with putty is a common and simple plumbing task that anyone can do. Putty is a pliable material that fills in the cracks and holes in pipes, allowing them to be resealed and reconnected. It is an ideal material for repairing plumbing fixtures since it is easy to use and long-lasting. With the right tools and technique, repairing a pipe with putty is a straightforward process that can be completed in a short amount of time. This article will provide a step-by-step guide on how to repair a pipe with putty.
What Is Putty and What Are Its Uses?
Putty is a type of material mainly composed of calcium carbonate, which is often used for sealing, filling, and/or repairing a variety of materials such as pipes, wood, glass, and metal. Putty is available in several forms, such as epoxy putty, plastic putty, and wood putty, and is available in several colors, including white, black, and clear. Putty is a versatile material, able to seal gaps, fill cracks, and repair damages. It can also be used for a variety of other tasks, such as creating a protective seal on a surface, repairing broken furniture, and filling holes in walls.
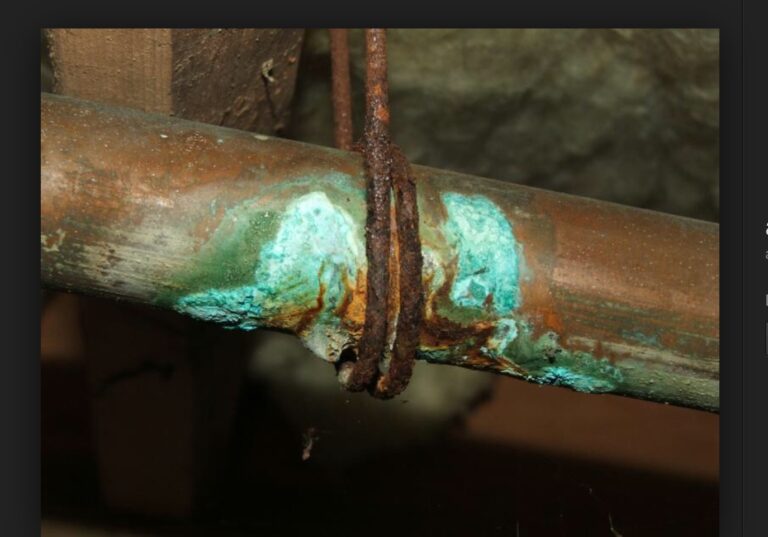
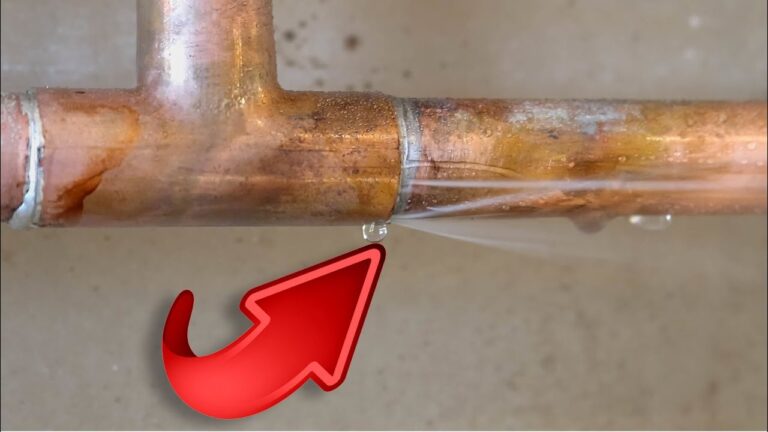
In the case of pipes, putty is used to repair small and minor damages, such as cracks, chips, and leaks. It is also used to seal joints and create a waterproof seal. Putty is a cost-effective solution for minor pipe repairs, as it is easy to apply and available in a variety of forms. Additionally, it is durable and able to withstand extreme temperatures, making it a popular choice for pipe repairs. To repair a pipe with putty, the damaged area must be cleaned, the putty must be applied correctly, and the putty must be given time to harden and cure.
Preparing the Putty for Application
Before applying putty to a leaking pipe, proper preparation is a must. To ensure that the repair is successful, the pipe and the putty should be prepared for the application. First, clean the area around the leak thoroughly to make sure there is no dirt or debris that could interfere with the putty’s adhesion to the pipe. Then, use a wire brush to clean the area where the putty will be applied. This will help the putty to adhere firmly to the pipe. Once the area is clean, dry the pipe with a towel or cloth.
Next, apply the putty to the area that needs repairing. It’s important to make sure that the putty is mixed properly as instructed by the manufacturer. Some putty may require kneading or stirring before application. Make sure to apply the putty evenly and firmly to the pipe. Once the putty is applied, use a putty knife or other similar tool to shape it and make sure that it is properly sealed around the pipe.
Finally, allow the putty to set and dry as instructed by the manufacturer. If the putty is not given enough time to set properly, it may not form a strong bond with the pipe and the repair will not be effective. Once the putty has been given adequate time to set and dry, the repair should be complete. With proper preparation and application, putty can be an effective way to repair a leaking pipe.
Applying Putty to the Pipe
Pipe putty is a great way to repair cracked, broken, or leaking pipes and is often used by plumbers and DIYers alike. But it’s important to follow certain steps when using pipe putty in order to ensure a strong and durable repair. In this article, we’ll cover the basics of repairing a pipe with putty.
First, the area around the pipe must be cleaned thoroughly to ensure that the putty adheres properly. Next, an appropriate amount of putty should be applied directly to the pipe, taking care to ensure that it is evenly distributed. After that, the putty should be kneaded into a ball and then pressed firmly against the pipe, paying special attention to the area that needs to be sealed.
Once the putty has been applied, the excess should be wiped away and then the pipe should be allowed to dry for at least 24 hours. After that, the repair should be checked for leaks and if all is well, the putty can be painted to match the surrounding area.
Using pipe putty is a great way to repair plumbing issues quickly and easily. With a few simple steps, you can ensure a strong and durable repair that will last for years to come. So, the next time you need to repair a pipe, don’t forget to reach for the putty!
Curing and Finishing the Putty Repair
Plumbing repairs can be intimidating, but when done correctly, they can save you time and money. Putty is a popular option when it comes to repairing pipes, as it is easy to use and available in most hardware stores. But how do you actually repair a pipe with putty?
First, clean the area around the pipe with a cloth, then dry it off. Then, apply the putty over the hole in the pipe, pressing it firmly and evenly. Once the putty is in place, use a putty knife to smooth it out and make sure the edges of the putty are flush with the pipe. For a stronger seal, you can add a second layer of putty.
Once the putty is applied, you should wait for it to cure before turning the water back on. Depending on the type of putty you used, the drying time can range from several minutes to several hours. Make sure you read the instructions on the product to determine the exact curing time.
After the putty has cured, you can finish up the repair by wiping away any excess putty with a damp cloth. Finally, turn the water back on and test the pipe to make sure the repair was successful. If it is still leaking, you may need to try the repair again.
Using putty to repair a pipe is a fairly straightforward process, but it is important to remember that the curing time is essential in order to ensure a successful outcome. With the right instructions and a bit of patience, you should be able to repair your pipe in no time.
What Are Some Alternatives to Putty for Pipe Repairs?
No matter the type of pipe, it is important to make sure it is repaired properly. Putty is a popular option for pipe repair, but it’s not the only one. There are a variety of alternatives that can be used for pipe repair, depending on the situation. For example, PVC cement is great for repairing PVC pipes and can be used in a variety of situations. Epoxy is also an excellent choice for pipe repairs and can be used to fill in gaps or cracks. Both options are waterproof and highly durable. If the pipe requires a patch, rubber patches can also be used. They are easy to install and can be used on any type of pipe. For more permanent repairs, heat-shrink tape can be used. It is a durable and waterproof option that can be used to patch up any type of pipe. Finally, plumber’s tape is also an excellent choice for pipe repair. It’s a strong and waterproof tape that creates a tight seal and is great for patching up pipes. Whatever the situation, there’s sure to be a pipe repair option that will suit the situation.
Tips for Successful Putty Pipe Repairs
Pipe putty is an effective and easy-to-use material for repairing minor leaks and cracks in pipes. It is also a great way to seal threaded joints as well as other types of pipe connections. With the right materials and some know-how, pipe putty repairs can be a great DIY project. Here are some tips for successful putty pipe repairs.
Firstly, always make sure that the pipe surfaces are clean and dry before applying the putty. Secondly, apply the putty evenly and make sure that it completely covers the area of the repair. Thirdly, use a putty knife or a putty wheel to work the putty into the pipe surface. Finally, ensure that the putty is allowed to dry and cure completely before using the pipe.
Pipe putty is an effective and affordable way to repair small leaks and cracks in pipes. With proper preparation and a few tools, anyone can make pipe putty repairs quickly and easily. The tips above will help you make sure that your pipe putty repairs are successful and long-lasting.
FAQs About the How Do You Repair A Pipe With Putty?
Q1: What is pipe putty?
A1: Pipe putty is a pliable sealing material that is used to seal plumbing joints and prevent water leaks. It is a putty-like substance made of either a silicone-based material or a non-hardening compound.
Q2: How do I apply pipe putty?
A2: Pipe putty should be applied to clean, dry surfaces. First remove any debris from the area to be sealed and then apply a generous, even amount of putty over the entire area. Use your fingers or a putty knife to spread it evenly. Allow the putty to dry before connecting the pipes.
Q3: How long does pipe putty last?
A3: Pipe putty can last for many years, as long as it is applied correctly and the pipes are not exposed to extreme temperatures. It is important to keep an eye on the sealant and make sure it remains intact. If it begins to deteriorate, it is best to reapply the putty to ensure a strong seal.
Conclusion
Repairing a pipe with putty is a relatively simple and cost-effective way to fix minor pipe damage. It is important to make sure that the putty is properly applied and that the pipe is properly sealed to ensure a reliable and lasting repair. With some patience and the right supplies, repairing a pipe with putty can be a successful and cost-efficient project.


